


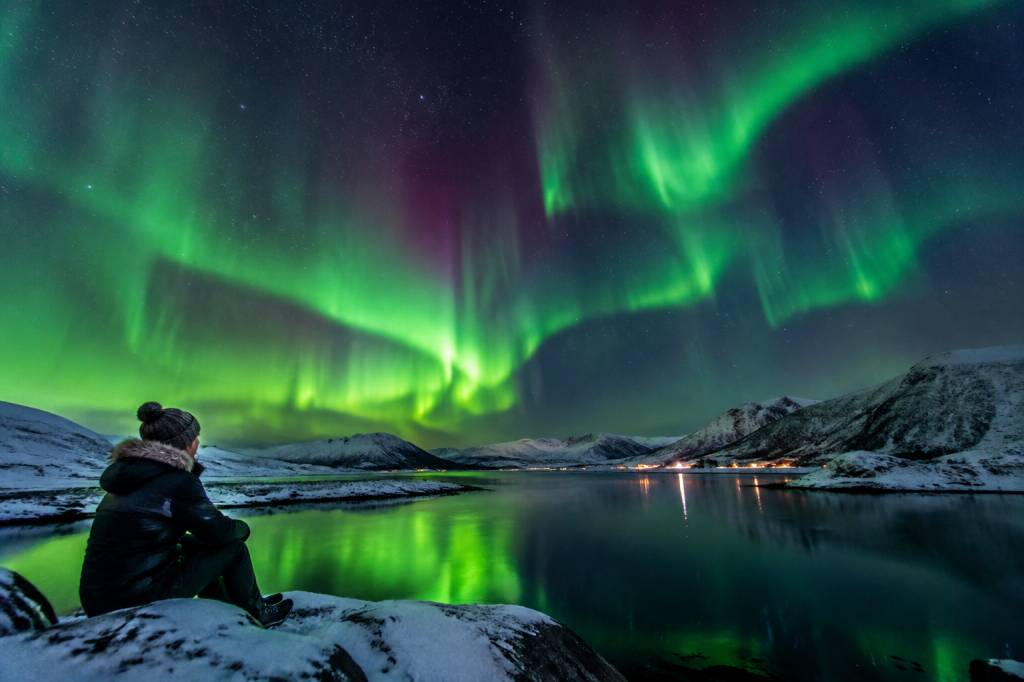
A three-day aurora forecast is useful for choosing when and where to look—but it is not a promise that the northern lights will appear over your hotel. The forecast can help you use your time well, especially when you combine solar activity with cloud cover, darkness, and a practical escape route from city lights.
The simplest plan is to treat the forecast as a moving decision tool. Check it before you travel, update it each day, and keep more than one viewing option available. A modest aurora display under clear skies can be more rewarding than a strong forecast hidden behind a thick cloud deck.
What a three-day aurora forecast can tell you
A three-day forecast gives you a short planning window for geomagnetic activity. It can indicate whether conditions may be quiet, unsettled, or favorable for aurora visibility. It cannot tell you exactly when a display will begin, how long it will last, or whether a particular street or viewpoint will have clear skies.
Solar wind conditions take time to reach Earth, and forecasts change as new measurements arrive. Activity may rise or fade within a single evening. Treat a forecast three days ahead as a useful signal, not a fixed schedule. The closer you get to the night, the more important current data becomes.
For a viewing trip, think of the forecast as three separate questions:
-
Is geomagnetic activity likely to be strong enough for aurora to be visible at your location?
-
Will the sky be clear enough to see it?
-
Can you reach a dark, safe viewpoint while the sky is active?
You need workable answers to all three. A high activity forecast cannot shine through clouds, and a clear sky is not much help if you are standing beneath bright city lights.
Read the KP index without letting it run the trip
The KP index is a measure of geomagnetic disturbance on a scale from 0 to 9. It is often the first number travelers look for, but it is not a simple aurora score. A higher KP value generally means aurora activity may be visible farther from the polar regions. It does not guarantee a bright display, and a low value does not rule one out near the auroral zone.
At locations such as Tromsø, Fairbanks, or parts of Iceland, auroras can appear during relatively modest activity because these destinations are already well placed beneath the auroral oval. In more southerly locations, stronger geomagnetic conditions may be needed. The same KP value can therefore mean different things depending on where you are.
Use KP as one piece of context. If your destination is far north, do not cancel a clear night just because the number looks low. If you are farther south, a rising forecast may be a reason to stay ready, but keep checking local sky conditions. The sky above your viewpoint is the final test.
Cloud cover is the make-or-break forecast
For most short aurora trips, cloud cover has more immediate importance than the KP index. Check a local cloud forecast for the specific hours you expect to be outside, not just the daily summary. A location may be overcast at 8 p.m. and clear after midnight, or the reverse.
Look at cloud layers as well as overall coverage when those details are available. High, thin cloud can dim the display, while thick low cloud can block it completely. Forecast maps are helpful, but mountain valleys, coastal winds, and local weather can produce conditions that differ from the regional picture.
Build flexibility into your plan. If the forecast shows cloud over town but clearer skies inland, identify a reachable alternative before evening. A short drive can make the difference, but only if roads are open and the route is safe for current conditions. Do not chase a tiny clear patch across unfamiliar winter roads without checking visibility, road reports, and your return journey.
Use the three-day window as a planning sequence
Rather than trying to make one perfect prediction three days in advance, give each day a job. This keeps the forecast useful without making you refresh it every ten minutes.
-
Three days before: Check the broad activity outlook and the weather trend. Confirm your accommodation, transport, and likely viewing areas. Choose a main location and at least one practical backup.
-
One day before: Compare the latest aurora outlook with hourly cloud forecasts. Check sunset, darkness, local road conditions, and any access restrictions. Decide whether you will view from town or travel outside it.
-
On the day: Recheck the forecast in the late afternoon and again before leaving. Watch for changes in cloud cover and activity. Keep your plan flexible enough to wait, move a short distance, or return to town.
This approach is more reliable than booking a long drive based on a single forecast screenshot. It also reduces forecast stress: you have a plan, a backup, and a clear time to make the next decision.
Choose a viewing spot you can actually use
A dark-sky location does not need to be remote. The best spot is one that gives you a wide view of the sky, limited artificial light, safe footing, and a straightforward way back. A viewpoint that looks impressive on a map may be closed in winter, difficult to park at, or exposed to dangerous wind.
Before you go, check whether the site has a maintained car park and whether overnight access is allowed. Do not park on a road shoulder or block a snowplow route. If you are walking from a parking area, bring a headlamp and keep to marked paths where possible. Snow can hide ditches, ice, and uneven ground.
In a city, start with the darkest accessible area near your accommodation: a waterfront path, a large park, or an open viewpoint may be enough during a bright display. If clouds break briefly, staying close can be better than spending the clear spell in a car. For a longer outing, make sure someone knows where you are going and when you expect to return.
Plan your hours, not just your destination
Auroras can appear at different times of night. There is no reliable rule that says the best display always begins at midnight. In the Arctic winter, darkness may last for many hours, so use hourly cloud forecasts and current aurora data to decide when to be outside.
Give yourself a realistic viewing window. If conditions are promising, allow time to settle in rather than arriving, taking one photograph, and leaving after ten minutes. Displays can build gradually. On the other hand, you do not need to stand in the cold all night if clouds are thick and the forecast offers no nearby clearing.
Set a check-in routine: review conditions before dinner, make a go-or-wait decision, then check once more before departure. If the sky is partly cloudy, choose a location with a clear view in more than one direction. Gaps can move quickly, and the aurora may be visible through a break even when the rest of the sky is covered.
Pack for waiting in cold, dark conditions
Standing still gets cold faster than walking. Dress in layers, with a warm outer shell, insulated gloves, a hat, and footwear with good grip. Bring spare hand warmers if you use them, but do not rely on them instead of proper clothing.
-
Carry a charged phone, an offline map, and a portable battery kept warm inside a pocket.
-
Use a headlamp with a red-light setting if available, and keep white light pointed away from other viewers.
-
Bring water and a small snack, especially if you are heading away from town.
-
Take a tripod if you plan to photograph the sky, but do not let camera settings distract you from watching the display.
-
For a driving trip, carry winter essentials and check fuel, tires, and road conditions before setting out.
A warm vehicle can be a useful shelter between checks, but avoid leaving it in a place where it blocks traffic or creates a hazard. In severe weather, turn back. No aurora is worth taking a risk on an icy, unfamiliar road.
Set realistic expectations for what you will see
Auroras do not always look like the bright green curtains in travel photographs. A faint display may appear pale to the naked eye, while a camera sensor records more color during a long exposure. Strong displays can move, ripple, or form arcs, but their appearance changes from one minute to the next.
Give your eyes time to adjust to the dark. Avoid staring at a bright phone screen, and look across a broad area of sky rather than focusing on one point. If you see a faint gray-green band, take a quick photograph to check it, then return to watching with your eyes.
It is also normal to have an unsuccessful night. Cloud, solar activity, and timing are outside your control. If you have several nights in your itinerary, each one gives you another chance. If you have only one, plan a second activity that still makes the evening worthwhile, such as a local night walk or a warm meal near your viewing area.
A practical example: two possible nights
Imagine you are staying in a northern city for three nights. The activity forecast looks modest on the first evening, but the sky is clear. On the second evening, the activity outlook improves while thick cloud is forecast over the city. The third evening is uncertain, with a chance of broken cloud.
Do not automatically save all your effort for the second night. On night one, try a nearby dark viewpoint: clear skies and modest activity may still produce a visible aurora. For night two, check whether a safe, reachable area has better cloud conditions before driving. Keep the route and return plan conservative. On night three, stay flexible and make the decision using the latest local forecast rather than the earlier outlook.
This is the value of a three-day forecast. It helps you distribute your chances, not identify a guaranteed winning night.
Keep a simple decision checklist
Before leaving your accommodation, ask four practical questions:
-
Is there enough darkness at my location and at the time I plan to go?
-
Does the hourly cloud forecast show a usable opening, either here or nearby?
-
Is the aurora outlook worth waiting for, given my latitude and the latest data?
-
Is my route safe, open, and easy to leave if weather conditions worsen?
If the answer to the last question is no, choose a safer viewing spot. If the clouds are the main problem, look for a nearby alternative rather than driving farther simply because an app shows a higher KP number. If conditions are unclear, wait for the next update and keep your clothing ready.
A good aurora trip is built on flexible decisions, not perfect prediction. Check the three-day outlook to organize your evenings, use local cloud data to choose your timing, and keep a safe backup close at hand. Then give the sky a little time. The forecast can point you in the right direction; the final show is still nature’s call.