


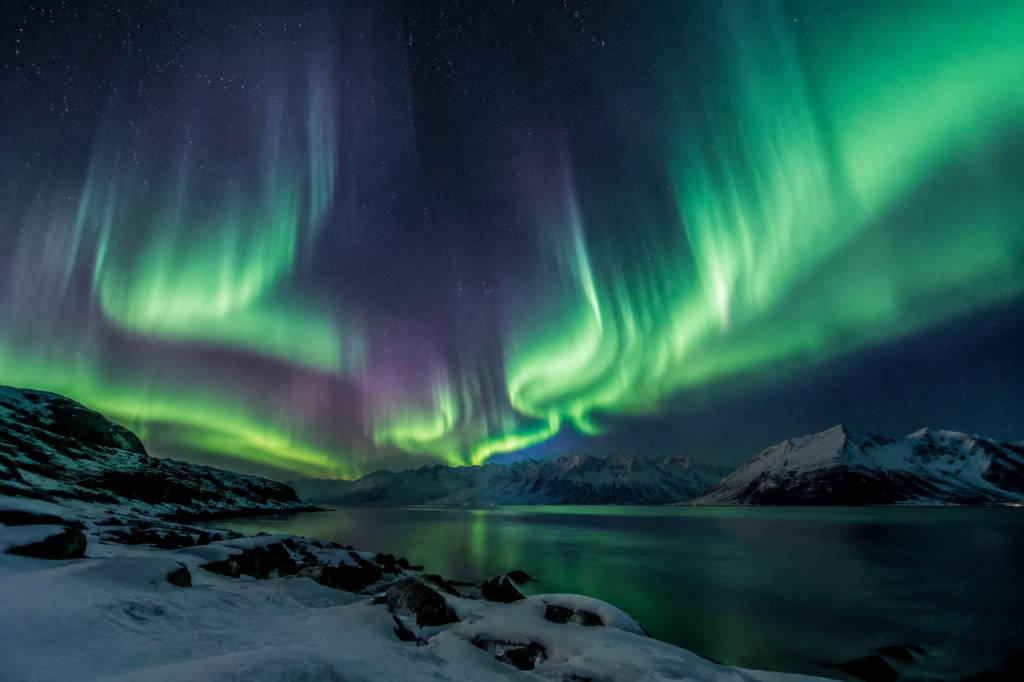
Are the northern lights going to be visible tonight? The honest answer depends on where you are, how clear the sky is, and whether the aurora is active during your local hours of darkness. A strong forecast is encouraging, but it is not a guarantee. A modest forecast can still produce a memorable display if you are far enough north and find a clear, dark view.
Rather than relying on a single number or app notification, check three things together: aurora activity, cloud cover, and darkness. Then choose a viewing spot you can reach safely and give yourself enough time to adapt if conditions change. Here is a practical way to make that call tonight.
First, check the forecast for your location
Aurora forecasts are regional, not universal. A forecast for Tromsø does not necessarily apply to Reykjavik, and conditions can vary substantially between a city and a nearby coast or valley. Start with the forecast for your actual location, or for the place you can realistically travel to this evening.
Check the forecast close to your planned departure, then look again when you arrive. Aurora activity can change quickly, while cloud forecasts often become more useful at local scale as the evening approaches. If your forecast page includes a map, use it to compare nearby areas rather than assuming that the whole region has the same conditions.
Also confirm the time zone. Some aurora maps display Universal Time (UTC), while your phone and local weather service may use local time. A promising activity spike at 02:00 UTC could fall at a very different hour where you are. Check the time label before planning around a predicted peak.
Read the three signals that matter most
Aurora activity: Many forecasts show the KP index, a scale used to describe geomagnetic activity. Higher KP values can mean that auroras may be visible farther from the Arctic, but KP is not a personal “visibility score.” Near the auroral zone, a low or moderate reading can still accompany visible activity. Farther south, stronger activity is generally needed, but it still cannot guarantee a sighting.
Cloud cover: Clouds are often the deciding factor. A lively aurora behind a thick cloud layer is still hidden from view. Check hourly cloud cover, and, if possible, distinguish low, middle, and high clouds. A forecast showing a large patch of clear sky nearby may be more useful than a high activity number over your town.
Darkness: You need a dark sky to see the display clearly. Check local sunset, the end of twilight, and sunrise. In northern summer, some destinations have little or no true darkness, which limits viewing even when the Sun is active. In winter, the long nights provide more opportunity, but moonlight, streetlights, and headlights can still affect what you see.
Think of these as three separate pieces of the same plan. Activity suggests whether an aurora may form, clouds tell you whether you can see it, and darkness tells you whether the sky is suitable. No single indicator replaces the other two.
What a KP number can—and cannot—tell you
KP is useful for understanding broad geomagnetic conditions, but it is easy to overinterpret. It is not a countdown to a visible show, and it does not describe the brightness of the aurora directly above your viewing spot. Conditions can vary across a region, and a forecast made hours ahead may not match what happens later.
For a traveler in northern Norway, northern Iceland, or Finnish Lapland, a low KP reading is not automatically a reason to stay indoors. You are already at a latitude where auroral activity may be visible during relatively modest conditions. Farther south, the same reading is less encouraging, but a stronger event could bring the aurora into view. In both cases, clear skies and a dark horizon remain essential.
Use KP as one clue, not a verdict. If the number looks disappointing but the sky is clear, consider a short local check rather than cancelling the evening outright. If the number looks excellent but the forecast shows solid cloud, look for a clear-weather alternative before driving anywhere.
Choose a viewing spot with a practical backup
The best location is not necessarily the most remote one. You need a safe place with a reasonably dark sky, an open view, and a route you can use in current conditions. A nearby shoreline, a public viewpoint, or a designated parking area can be a better choice than an unfamiliar mountain road.
Look for an unobstructed view toward the darkest part of the sky. In the northern hemisphere, auroras often appear toward the north, but displays can spread across the sky or overhead. Do not limit your view to one direction. Trees, buildings, ridgelines, and bright lamps can block part of the show, so a wide horizon helps.
Before leaving, identify a second option. If your first spot becomes cloudy, foggy, crowded, or unsafe, you should know where you can go instead. Keep the backup within a sensible driving distance and check its access, parking, and road conditions. A clear patch on a map is not useful if it requires a closed road or a risky stop on the shoulder.
City viewing can work when activity is strong, especially from a park, waterfront, or open area away from direct lighting. If you are staying in town, try a dark public space first. You may see less detail than you would in the countryside, but you avoid spending the whole evening driving in search of a perfect forecast.
When should you go outside?
There is no universal best hour. Aurora activity can rise and fall through the night, and a forecast’s predicted peak should be treated as a window rather than a scheduled appointment. Check the hourly outlook, but be ready to watch before and after the strongest predicted period.
For a first attempt, arrive when the sky is properly dark and give your eyes time to adjust. Allow at least 20 to 30 minutes away from bright phone screens and headlights. If you step outside, look at your screen, then return to the sky, your night vision has to start working again. Keep your phone dimmed and use a red-light setting if it has one.
If clouds are moving across the area, wait for a gap rather than deciding too early that the night is over. A brief opening can reveal an aurora that was hidden minutes before. On the other hand, if the cloud cover is thick and uniform across the region, repeatedly checking the same patch of sky may not improve your odds. Use your backup plan or save your energy for another night.
What to look for in the sky
The aurora does not always look like bright green curtains. It may appear as a pale band, a diffuse glow, or a faint patch that is easy to mistake for a cloud at first. The display can brighten, move, and fade over a short period. Give your eyes a chance to adjust before deciding that nothing is happening.
Check whether the feature changes shape or position. Ordinary clouds usually move with the wind and keep a softer, more uniform appearance. Auroral structures may form arcs, rays, or rippling curtains. A camera can sometimes record colour and detail that are subtle to the naked eye, but a phone image alone is not proof that a bright display was visible in person.
Do not spend the whole night looking at a screen. Take a quick photo if you want, then look up. The point is to watch the sky, not to conduct a long negotiation with your camera settings.
What to bring for a comfortable wait
Standing still in winter feels colder than walking, especially when the ground is damp or wind is blowing. Dress for the time you expect to spend outside, not just the temperature you feel beside a warm car. Layers make it easier to adjust without ending the outing early.
-
Wear warm base layers, an insulating mid-layer, and a windproof outer layer.
-
Use insulated footwear and warm socks; bring spare gloves if you have them.
-
Pack a hat, snacks, water, and a fully charged phone.
-
Bring a tripod if you plan to take long-exposure photographs.
-
Carry a headlamp or flashlight, but point it away from other viewers and use a low setting when possible.
-
Keep a car blanket and a charging cable available, without relying on the vehicle as your only source of warmth.
If you are travelling with children or anyone who gets cold quickly, set a realistic waiting time and keep a warm indoor option in mind. A short, comfortable viewing attempt is better than an exhausting night that leaves everyone miserable.
Drive and wait safely
Never stop in the middle of a road, on a narrow shoulder, or somewhere that blocks access for emergency vehicles. Choose a legal parking area or a designated viewpoint, and check local rules before using private land. In remote regions, winter roads can be icy, visibility can change quickly, and mobile coverage may be limited.
Check road conditions before setting out and tell someone where you are going if you plan to visit an isolated area. Keep enough fuel for the return journey, and do not drive while distracted by a forecast app. If weather or road conditions deteriorate, turn back. An aurora is not worth taking a risk for.
At the viewing spot, stay clear of traffic and avoid walking onto frozen water unless local authorities confirm it is safe. Darkness can make familiar ground difficult to read. Use a light to check the path when needed, then switch it off or lower it while watching.
If the forecast looks poor tonight
A poor forecast does not always mean that your trip is over. First, separate the problem: is aurora activity low, is the sky cloudy, or is it not dark enough? Each issue has a different response. You cannot change the season, but you may be able to move to a clearer area or choose a darker viewpoint.
If clouds are the main problem, compare nearby hourly forecasts and satellite imagery where available. Look for a realistic clear-sky gap, not a distant bright patch that would take hours to reach. If activity is low, stay flexible if you are already in a northern destination; conditions can shift, but plan a warm indoor alternative rather than waiting outside indefinitely.
Keep expectations grounded. A successful aurora trip is not measured only by a vivid display. You may see a faint glow, spend a pleasant evening under a clear Arctic sky, or learn which local viewpoints work best for another night. The forecast helps you make a better decision; it cannot promise a performance.
A quick decision check before you leave
Before getting into the car, take one minute to answer these questions:
-
Is it dark enough at my location to see the sky clearly?
-
Is there a reasonable chance of auroral activity for my latitude?
-
Are the clouds clear enough at my chosen spot, or is there a nearby alternative?
-
Can I reach the viewing area and return safely under current road conditions?
-
Do I have warm clothing, a charged phone, and a backup plan?
If most answers are yes, it is worth going out. If the sky is heavily overcast everywhere nearby, a high KP reading will not fix that. Recheck the forecast later, stay flexible, and protect your time and safety as carefully as you protect your camera battery.
So, are the northern lights going to be visible tonight? The forecast can tell you whether the ingredients look promising, but the sky makes the final decision. Check activity, clouds, and darkness together; choose an accessible dark spot; and give your eyes time to adjust. That is the simplest way to turn tonight’s forecast into a sensible plan.