


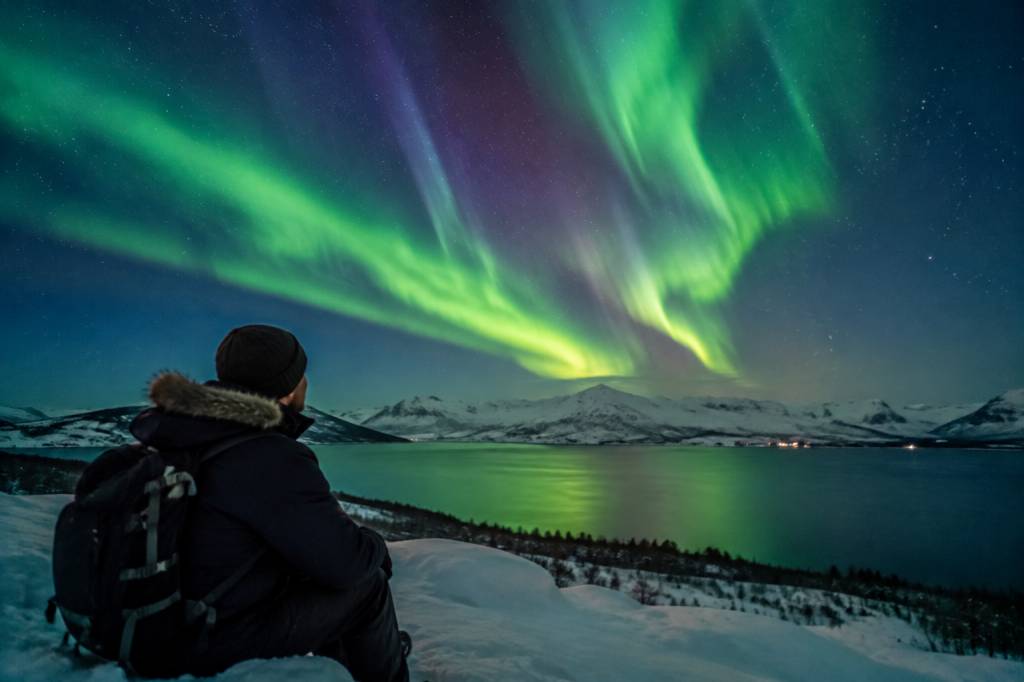
An aurora alert can turn an ordinary evening into a race against clouds, roads and the clock. But an alert alone is not a guarantee that the northern lights will appear above your location. To plan a successful aurora hunting trip, you need to understand what the forecast is telling you, how quickly conditions can change and where to go when the sky is partly cloudy.
The good news is that you do not need to become a space-weather specialist. A practical northern lights forecast combines a few key indicators: solar activity, the Kp index, local darkness, cloud cover and your distance from the auroral oval. Used together, these tools can transform a vague hope into a clear observation plan.
What an aurora alert really means
An aurora alert is a notification that geomagnetic conditions may be favorable for visible auroras. It can be triggered by a rise in solar wind speed, a southward-facing interplanetary magnetic field or the arrival of a coronal mass ejection. These events disturb Earth’s magnetic field and can push the auroral oval farther south than usual.
However, an alert does not mean that every location under the alert will see bright lights. The alert may cover a large region, while the actual aurora could be visible only through gaps in the cloud or only for a short period. Think of it as a signal to start checking the details, not as a promise of a display.
The most useful alerts include:
- The expected time window of the activity.
- The affected geographic region.
- The predicted strength of the geomagnetic disturbance.
- Information about cloud cover and visibility.
- A link to a live aurora map or short-term forecast.
For travelers, timing matters. A strong solar storm may produce auroras for several hours, but the best visibility can occur during a much shorter interval. Your aim is to be outside, away from strong artificial light, before the most promising window begins.
Start with the Kp index, but do not stop there
The Kp index is one of the most familiar numbers in northern lights forecasting. It measures global geomagnetic activity on a scale from 0 to 9. A higher Kp generally means that the auroral oval expands toward lower latitudes.
In northern Scandinavia, northern Iceland, Greenland and parts of Alaska or Canada, auroras can be visible with relatively low Kp values. In cities farther south, a stronger geomagnetic storm is usually needed.
- Kp 0–1: Quiet conditions. Auroras may still be visible under the auroral oval, especially in northern locations.
- Kp 2–3: Good potential in many Arctic destinations, provided the sky is dark and clear.
- Kp 4–5: Active to storm-level conditions. The auroral oval may expand, creating opportunities farther south.
- Kp 6 and above: A major geomagnetic storm. Auroras can become visible at unusually low latitudes, although cloud cover and timing remain decisive.
The Kp index is a global, three-hour measurement. That creates two important limitations. First, it does not describe conditions at every location in real time. Second, a forecasted Kp value can be revised significantly as new solar-wind data arrives.
For that reason, do not cancel an aurora trip because the forecast shows Kp 2 instead of Kp 4. If you are already in Tromsø, Kiruna or Rovaniemi, Kp 2 may be more than enough. Conversely, a Kp 6 forecast will not help if your viewing area is covered by thick cloud.
Use different forecast ranges for different decisions
A reliable aurora forecast is not one single number. It is a sequence of forecasts, each useful for a different planning stage.
Long-range outlook: plan the trip
Long-range solar forecasts can indicate whether the Sun is entering an active period. They are useful for choosing a season, comparing destinations or deciding whether to add extra nights to your itinerary. Their accuracy is limited, particularly beyond a few days, so treat them as planning guidance rather than a booking guarantee.
One-to-three-day forecast: choose your nights
Short-range forecasts become more useful when a solar event has been detected. They can help you identify the nights with the greatest potential and compare the expected activity with local cloud cover. At this stage, check several sources rather than relying on a single predicted Kp number.
Nowcasting: decide where to stand
Nowcasting covers the next few minutes to a few hours. This is the most valuable stage when you are already on location. Live solar-wind measurements, magnetometer data, satellite imagery and aurora oval maps can show whether activity is increasing, weakening or moving toward your area.
A practical routine is simple: check the broad forecast in the afternoon, review the local cloud forecast in the evening and use a live aurora map once you are ready to go outside. This avoids spending the entire day refreshing an app without making a decision.
Cloud cover is often more important than the Kp index
Aurora hunters sometimes focus so heavily on solar activity that they forget the atmosphere between them and the aurora. From the ground, a spectacular geomagnetic storm is invisible through a solid layer of cloud.
Before leaving, examine cloud cover at several altitudes. Low cloud may block the horizon while higher cloud remains thin enough for some light to show through. A completely clear forecast is ideal, but small breaks can be enough if the aurora is active.
Local weather can change quickly in coastal and mountainous regions. Tromsø, the Lofoten Islands, Iceland and northern Finland all have microclimates that can create very different conditions within a short driving distance. If your city forecast is cloudy, check nearby valleys, inland areas and higher ground—but never assume that a longer drive automatically means a better sky.
Always compare:
- Total cloud cover and the expected cloud base.
- Visibility and precipitation forecasts.
- Wind conditions, especially on exposed roads.
- Road status and the possibility of icy surfaces.
- Moonlight, which can affect landscape visibility but usually does not prevent bright auroras.
Build your aurora hunting plan around darkness
The northern lights can occur at any hour, but you need sufficient darkness to see them. During the bright summer months, many northern destinations experience midnight sun, making aurora watching impossible even if solar activity is strong.
The main season generally runs from late August or September through early April, depending on latitude. Autumn and spring can offer active skies, while the darkest winter weeks provide long observation windows. December and January are not automatically the best months, though. More darkness also means colder conditions, shorter daylight for driving and a higher chance of difficult roads.
Check the exact astronomical darkness for your destination. Civil twilight, nautical twilight and full darkness are not the same. A weak aurora may be difficult to see before full darkness, while a strong display can become visible during twilight.
Plan to arrive at your viewing location early enough to:
- Park safely without rushing.
- Find a clear view away from direct streetlights.
- Set up clothing and camera equipment before the activity increases.
- Identify a safe route back in case weather or road conditions deteriorate.
Choosing between a city and a remote location
You do not always need to leave town to see the northern lights. A city aurora forecast can be useful when activity is strong and the sky is clear. Parks, waterfronts, open sports fields and elevated viewpoints may provide enough darkness for a visible display.
Tromsø, Kiruna, Rovaniemi and Reykjavík can all offer urban or near-urban opportunities, but light pollution reduces contrast. A faint green arc may be invisible from a brightly lit hotel area while being obvious only a few kilometers away.
Remote locations improve darkness, but they introduce other practical concerns. Roads may be narrow, unlit and icy. Mobile coverage can be limited. A beautiful viewpoint is not useful if you cannot reach it safely or if you are blocking a road while trying to photograph the sky.
For a city-based plan, identify two or three accessible backup points. For a rural plan, choose a main location and a nearby alternative rather than attempting to chase every gap in the cloud. Aurora hunting should involve observation, not a midnight rally stage.
Read the aurora oval and live activity
The aurora oval is the zone around the geomagnetic poles where auroral activity is most likely. Its position changes with solar-wind conditions. A live aurora map can show whether the oval is directly overhead, to the north or expanding toward your location.
When the oval is north of you, face north and watch the horizon. If it moves overhead, auroras may appear across a much larger section of the sky. During a strong solar storm, the display can expand southward, creating opportunities in places that rarely see it.
Live images and activity charts can also help distinguish a forecast from a real event. Look for repeated signs of movement over several minutes rather than reacting to one dramatic color on a map. Some visualizations exaggerate intensity, while the sky above you remains the final authority.
Once outside, give your eyes time to adjust. Weak auroras may appear gray or pale green at first, especially under light pollution. A camera can record stronger color than your eyes can see, but a photograph alone does not prove that the display is bright enough for comfortable naked-eye viewing.
What to pack for a northern lights trip
Aurora watching involves long periods of standing still in cold conditions. Pack for waiting, not walking. Thermal base layers, an insulating mid-layer, a windproof outer shell, warm socks and insulated boots are more important than fashionable travel clothing.
Bring a headlamp with a red-light mode, spare batteries, a charged phone and a power bank. In freezing temperatures, batteries lose capacity quickly. Keep your phone and camera batteries close to your body until you need them.
For aurora photography, a tripod, a wide-angle lens, manual focus and a remote shutter or timer are useful. Set focus to infinity before leaving the hotel, then check it using a bright star or distant light. Use a short enough exposure to preserve movement when the aurora is dancing, and lengthen it only when the display is faint.
Do not let camera settings distract you from the sky. The best northern lights photograph is not worth standing in an unsafe location, walking onto a road or ignoring rapidly changing weather.
A simple evening workflow
Here is a practical routine that works for most destinations:
- Afternoon: Check the latest solar forecast, expected Kp range and local cloud cover.
- Early evening: Select your main viewing point and one nearby backup location.
- Before departure: Confirm road conditions, fuel, battery levels and clothing.
- On location: Use a live aurora map and face the part of the sky where the oval is strongest.
- During quiet periods: Wait at least 20 to 30 minutes if conditions are safe. Activity can build quickly after a quiet interval.
- If clouds arrive: Compare nearby areas, but do not drive continuously without checking whether the sky is actually clearer.
- Before returning: Recheck the road and weather conditions. Visibility can deteriorate after you arrive.
This approach also helps manage expectations. Some nights produce a dramatic sky. Others offer only a faint band near the horizon. Both are genuine aurora experiences, and a well-planned trip gives you more opportunities without depending on one perfect forecast.
How to avoid common forecast mistakes
The most common mistake is treating a high Kp value as a guarantee. The second is ignoring local cloud cover. A third is checking a forecast once in the morning and assuming it will remain unchanged all night.
Forecast models can shift as solar-wind data improves. An incoming coronal mass ejection may arrive earlier or later than expected. Geomagnetic activity can also peak outside the predicted window. Keep your plan flexible, especially if you have several nights available.
Finally, avoid chasing alerts from distant locations without considering travel time and safety. If the forecast is promising in a neighboring region, calculate the full journey in darkness and winter conditions. Sometimes the best decision is to stay near your accommodation, find a darker local viewpoint and wait for the next burst of activity.
The most effective aurora hunters are not necessarily the people with the most expensive equipment or the highest tolerance for cold. They are the ones who combine a northern lights forecast with realistic local information. Track the solar activity, read the Kp index in context, check the clouds, protect your travel time and keep a safe backup plan. When the aurora alert arrives, you will know whether it is time to step outside, change location or simply keep watching the sky from a little longer.