Ask any first-time aurora chaser about planning their trip and you’ll usually hear the same sentence: “We booked around the new moon, so we’ve maximised our chances, right?” It sounds logical… but it’s only half true.
The moon can both help and hurt your northern lights experience. Sometimes bright moonlight will wash out faint auroras. Other times it will make the landscape look like daylight and give you the best photos of your life.
In this article, I’ll walk through how moon phases really affect your chances of seeing the northern lights, when bright lunar light is a genuine problem, and when you can safely stop worrying about the moon and focus on more important factors like clouds and the KP index.
What the moon actually changes (and what it doesn’t)
Let’s start with the most important point: the moon does not affect aurora activity itself. It doesn’t switch the northern lights on or off. What it changes is your ability to see them.
Bright moonlight acts like a huge natural floodlight. That has three practical effects:
-
It reduces contrast between the aurora and the sky, making faint lights harder to spot.
-
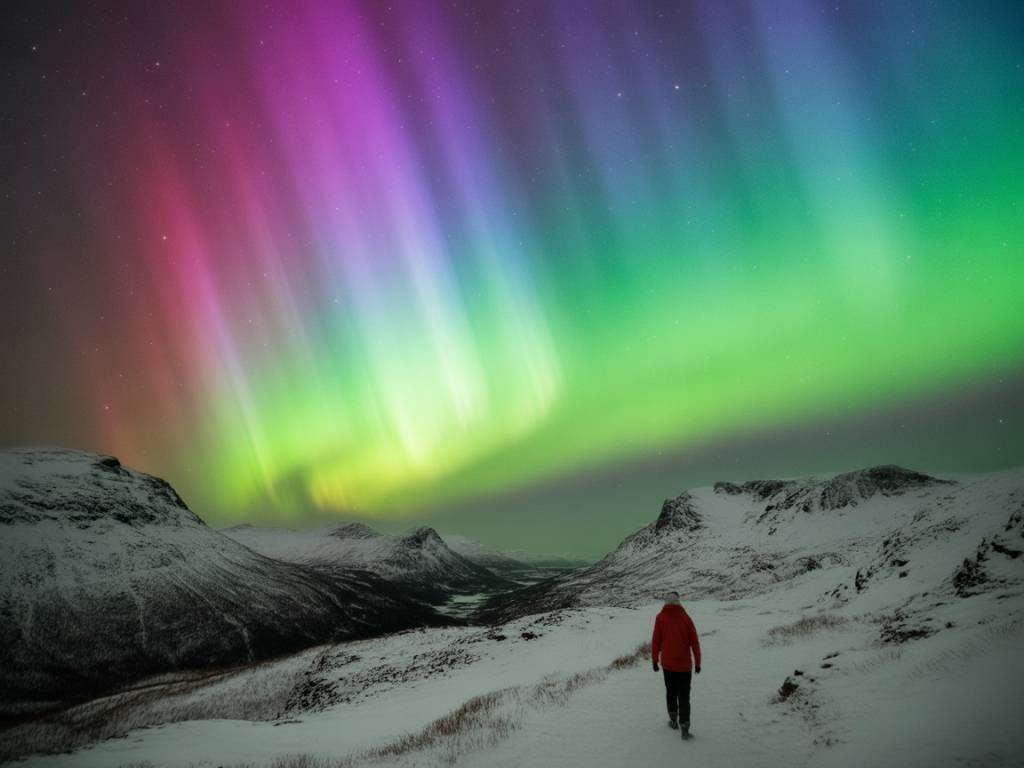
It brightens the foreground (snow, mountains, cabins), which can make your photos look much better.
-
It makes the night feel less “black”, which many travellers find less intimidating when walking or driving out of town.
So the right question isn’t “Is there a full moon?” but rather: “How bright is the aurora likely to be tonight, compared to the sky brightness from the moon and local light pollution?”
How bright is too bright? Understanding moon phases for aurora
Here’s the practical impact of each phase on a typical aurora trip in Northern Norway, Swedish Lapland, Finnish Lapland or Iceland. Assume you are standing outside of town, under a reasonably dark sky.
-
New moon (0% illumination)
The sky is at its darkest. This is ideal if:-
You are hoping to see very faint, low-activity aurora (KP 1–2).
-
You’re away from city lights and chasing every possible hint of green.
-
You do a lot of astrophotography (Milky Way + aurora).
Downside: the landscape is pitch dark. Focusing a camera is harder, walking on icy roads is trickier, and your photos may show a beautiful sky over a completely black foreground.
-
-
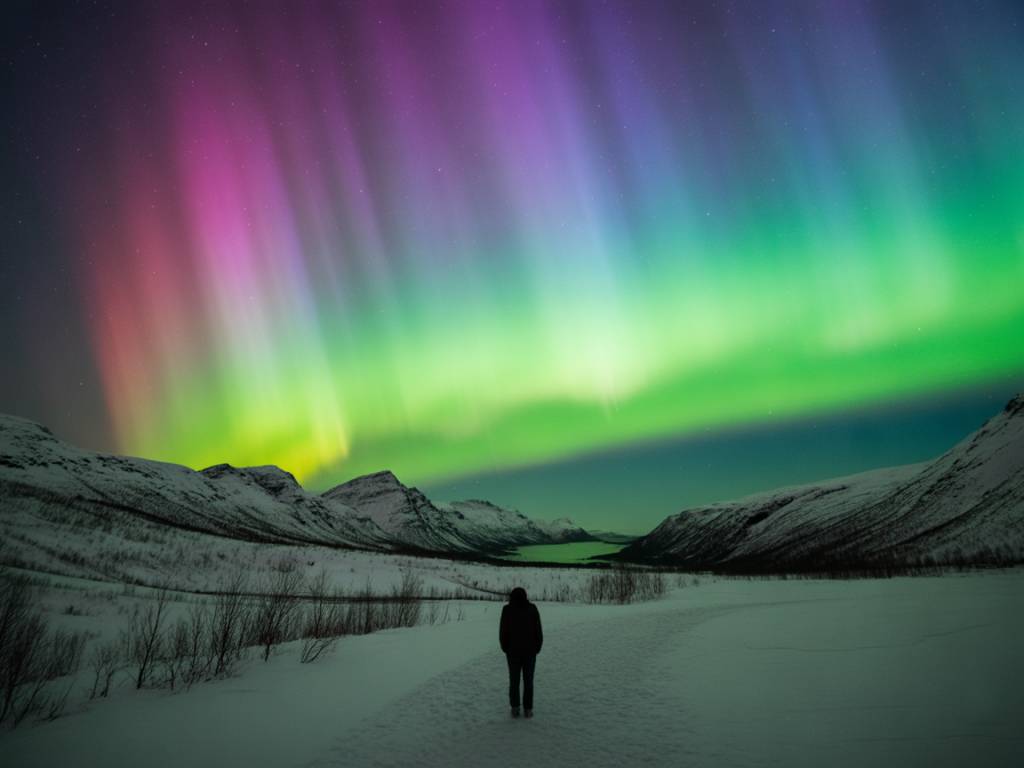
Waxing/waning crescent (5–25% illumination)
Very little impact on the northern lights. The sky is still dark, but you start to get a gentle glow on the snow and mountains.For most travellers, this is the sweet spot: dark enough for faint aurora, bright enough to see where you walk and get some structure in your foreground.
-
First/last quarter (≈50% illumination)
This is where the moon begins to matter for weaker auroras. You may lose the very faintest activity in the sky glow, but anything medium to strong will still be visible and photogenic.Good balance if you are not an ultra-obsessive chaser but still care about your photos.
-
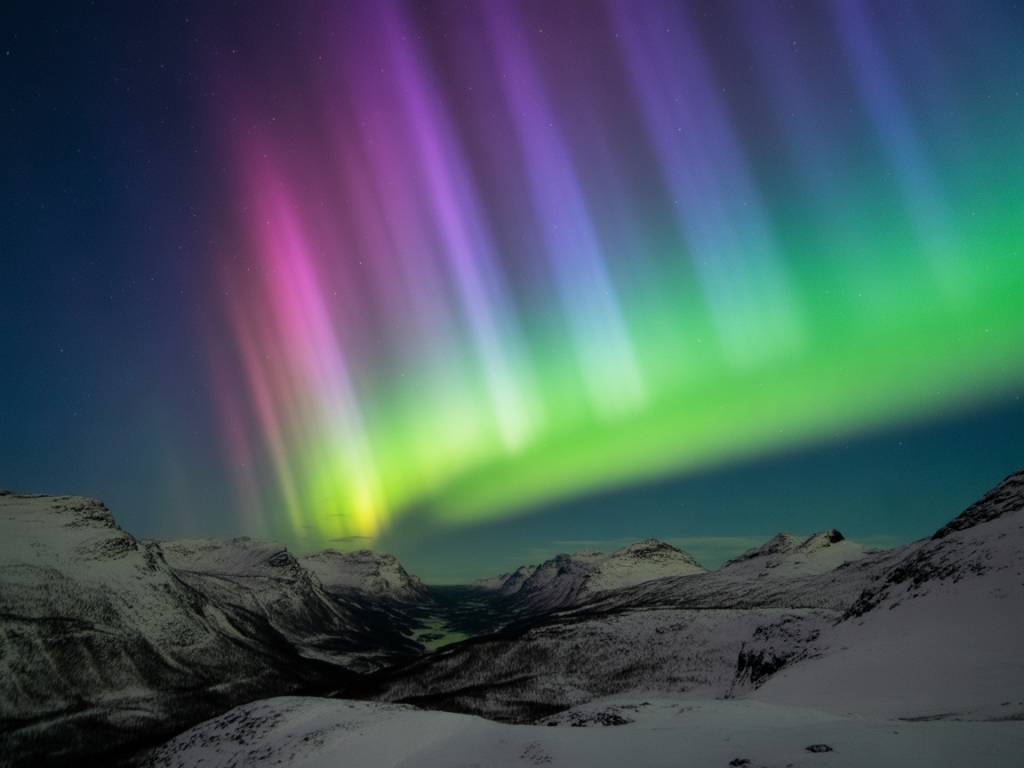
Gibbous to full moon (75–100% illumination)
Under a full moon in a snowy landscape, it can feel almost like daylight. Now, the moon will absolutely wash out faint auroras (KP 1–2, sometimes KP 3 if they are low and diffuse).However, any strong aurora (KP 4–6+) will still be clearly visible. I’ve watched powerful coronas explode overhead in a full-moon sky where you could see your shadow on the snow.
Key idea: the brighter the aurora, the less you need to worry about the moon. The weaker the aurora, the more the moon matters.
When bright moonlight really hurts your chances
Based on field trips and a lot of cold nights spent squinting at the sky, here are the situations where the moon is genuinely your enemy.
-
Trips during low solar activity
Around solar minimum, weak and diffuse auroras are more common. In these years, a full moon can easily drown out a KP 1 evening, especially at lower latitudes (like Scotland, southern Canada, northern Germany). -
Observing from lower latitudes
If you are on the southern edge of aurora visibility (for example, UK, Denmark, northern US states), you depend on very clear skies and maximum darkness. Here, yes: planning around the new moon is a strong recommendation. -
Chasing very soft arcs and “aurora haze”
Sometimes the aurora appears as a faint greyish band, barely visible to the naked eye but clear on camera. In these conditions a bright moon can flatten the contrast so much that the arc disappears visually, and even the camera struggles. -
Looking toward the moon direction
Stand with the moon in front of you and try to see a low, weak auroral band: it’s difficult even in dark locations. You’ll get a much better view by turning 90–180 degrees away from the moon, where the sky is darker.
If your trip is short (2–3 nights) and locked into a period of full moon and low predicted solar activity, you should manage expectations: you might still see auroras, but you will probably need a stronger-than-average storm for a spectacular show.
When the moon is actually your friend
The moon doesn’t only steal contrast. It also gives you some very practical advantages that most first-time chasers underestimate.
-
Safer driving and walking
A bright moon over snow makes icy roads, ditches and obstacles much easier to spot. If you’re parking along minor roads or walking to a viewpoint, this is not just “nice to have” – it’s a safety factor. -
Better landscapes in your photos
Full-moon nights can produce stunning aurora images: blue-toned snow, visible mountains, cabins glowing softly, all naturally lit. Without the moon, you need artificial light painting or very long exposures and you risk blowing out the aurora. -
Easier camera setup
Focusing in complete darkness is unpleasant. With a moon-lit snowfield you can focus on a distant object, adjust your composition more precisely, and help beginners in your group without constantly using headlamps. -
Less “black void” for nervous travellers
Not everyone is comfortable standing in a silent, pitch-black Arctic landscape. A bit of moonlight makes the whole experience feel calmer and more accessible, especially for families.
I’ve guided several nights where beginners saw their first aurora under a bright moon. None of them complained that it was “less magical”. They were just happy to see moving green light and recognise the mountains around them.
Moon vs KP index: which should you prioritise?
If you have flexibility on your dates, you might try to align two things:
-
Increased solar activity (for example around predicted coronal hole streams or active regions), and
-
Darker moon phases (new moon to first/last quarter).
But in real life, most travellers can’t fine-tune both. So what matters more?
For high-latitude destinations like Tromsø, Abisko, Finnish Lapland or northern Iceland:
-
KP forecast and cloud cover are more important than moon phase.
Under a strong geomagnetic storm (KP 5–7), the aurora will easily outshine the moon. If you can pick between:
-
Option A: Clear skies, KP 5, full moon
-
Option B: Thick clouds, KP 5, new moon
Option A wins, every time. Clouds are a hard stop. The moon is just a handicap that strong auroras can overcome.
For lower-latitude locations (e.g. Scotland, northern Germany, northern US):
-
Darkness and clear skies are critical. If you see a chance of a geomagnetic storm, try to be away from city lights and, if possible, around the darker moon phases.
Planning your nights: practical strategies by moon phase
Here is how I personally adjust my field strategy based on the moon, assuming I’m somewhere around the Arctic Circle with a rental car.
New moon to thin crescent: go as dark as you can
In this window you can hunt for the faintest auroras, so I prefer:
-
Driving far from town lights, especially away from orange sodium lamps along main roads.
-
Scanning the sky regularly for subtle grey bands that might brighten into visible aurora later.
-
Taking the opportunity to shoot stars + aurora with wide angles and slightly longer exposures (10–20 s).
Drawback: navigation and walking need more care. Keep a good headlamp, microspikes if it’s icy, and respect unploughed roads – in pure darkness it’s easy to misjudge snow depth.
Quarter moon: balanced nights
With around 50% moon, I tend to:
-
Choose viewpoints with interesting foreground (a cabin, trees, a fjord) because I know the moon will paint them nicely.
-
Use slightly shorter exposures (5–10 s) as both the sky and foreground are brighter.
-
Expect that very faint activity may be invisible to the naked eye, but still appears on camera – so I test-shot the northern sky from time to time.
Full moon or nearly full: let the moon work for you
Under a full moon I change my habits:
-
I don’t cancel the night – I just assume I’ll need a KP 3–4+ for a satisfying show.
-
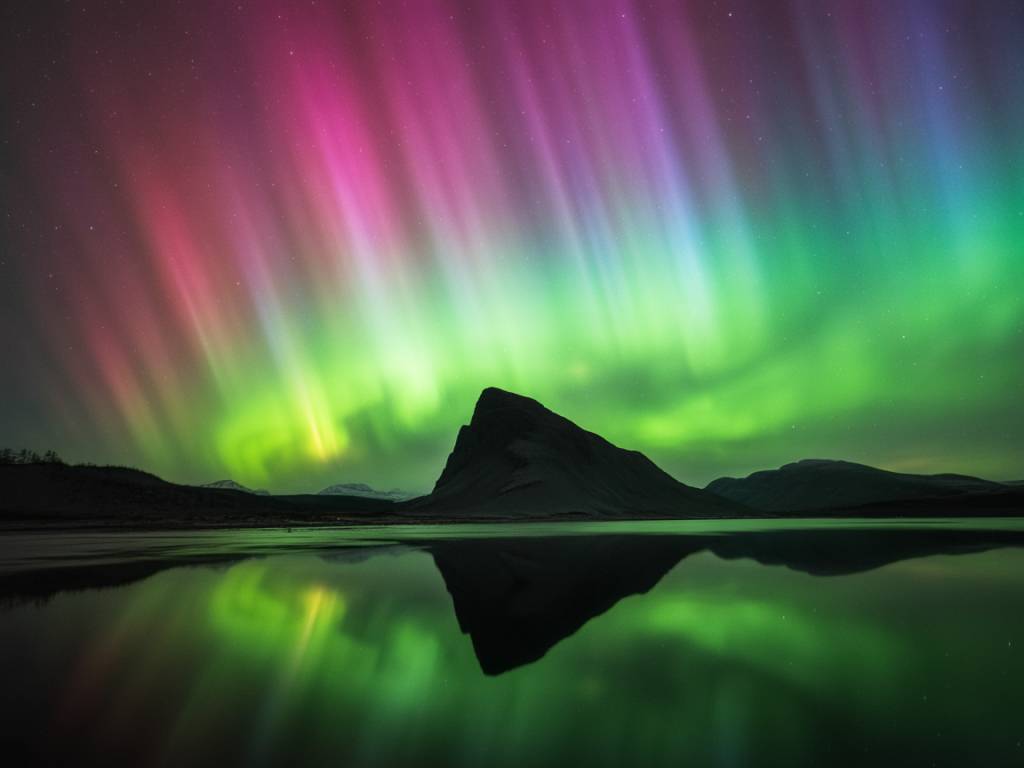
I pick wide, open landscapes where the moon can illuminate everything: beaches, frozen lakes, fjords, open valleys.
-
I watch opposite the moon as much as possible, where the sky is darker and auroras stand out more.
-
I lower ISO slightly and use shorter shutter speeds (2–6 s) to preserve structure in fast-moving auroras and avoid overexposed snow.
The goal here is not to “fight” the moon but to accept that your night will be more about bright, structured aurora if activity cooperates, and less about delicate, faint arcs.
Photography settings: adapting to moon brightness
If you’re shooting with a DSLR or mirrorless camera, the moon phase should nudge your basic settings.
-
Very dark sky (new moon):
Aperture: f/1.4–f/2.8
ISO: 3200–6400
Shutter: 8–20 s (depending on aurora speed) -
Crescent to quarter moon:
Aperture: f/2–f/3.5
ISO: 1600–3200
Shutter: 5–12 s -
Gibbous to full moon:
Aperture: f/2.8–f/4
ISO: 800–1600
Shutter: 2–8 s
These are starting points. Always review your histogram and adjust. With a bright moon and snow you will quickly blow the highlights if you push ISO or shutter too far.
Tip: on full-moon nights, use the extra light to include more foreground storytelling: friends on a snowy road, a cabin, a line of trees, a parked car. The aurora is the main actor, but the moon is your free stage lighting.
What about the moon’s position and timing?
The moon phase is only one aspect. Its altitude and rise/set times also matter in practice.
-
Low moon near the horizon: Sky is darker overhead, better contrast for auroras high in the sky, but you still enjoy some landscape light.
-
Moon high overhead: Maximum sky brightness. Tough for faint aurora, but very good for illuminated snow and terrain.
-
Moon below the horizon during part of the night: You can get the best of both worlds. For example, if the moon sets at 01:00, you get a brighter early session and then a darker late session if you’re still awake.
Use any basic astronomy app or website to check local moonrise and moonset for your destination. If you have one clear night in your trip and a decent KP forecast, you may decide whether to aim for the darker late hours or the easier early window depending on your group’s energy level and comfort with darkness.
So, should you plan your trip around the moon?
Here’s the bottom line in practical terms:
-
If you can choose your week freely: Aim for a window from new moon to just after first quarter. You’ll have dark skies but still some moonlit nights.
-
If your dates are fixed: Don’t panic if it’s full moon. Focus on picking a good latitude, good local climate and several nights in a row to beat the clouds.
-
If you live in a lower-latitude region: Try to watch for aurora alerts around the new moon and get as far as you can from city lights. There, the moon matters more.
And above all: remember that the northern lights are a contrast phenomenon. The key ingredients are:
-
Active aurora (solar wind + KP index)
-
Clear, dry air (low clouds, low haze)
-
Dark surroundings (little artificial light, minimal moonlight if activity is weak)
The moon is just one slider in this mix. Learn how it behaves, adapt your expectations and tactics, and you’ll stop fearing the full moon and start using it as another tool in your northern lights planning kit.