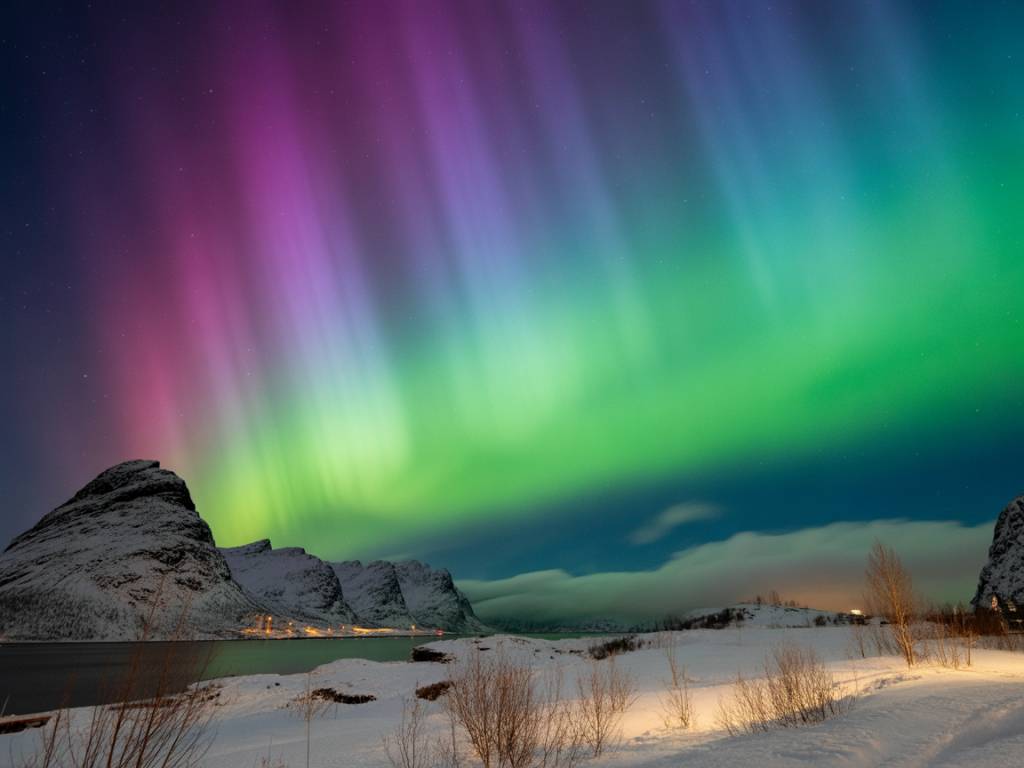
If you chase northern lights long enough, you quickly learn one thing: the forecast will betray you at some point.
You’ve checked the KP, you’ve picked a clear-sky spot, you’ve driven an hour out of town… and then the clouds roll in, or the solar wind slows down, or the aurora explodes exactly where you’re not. That’s normal. Aurora conditions can change in 15–30 minutes. The goal is not to avoid change, but to know how to adapt fast without panicking or wasting your night.
In this article, I’ll walk you through how I adjust my plans in real time during a northern lights hunt: what to watch, when to move, when to wait, and when to sleep. Think of it as a field manual for dealing with “forecast chaos”.
Understand what can actually change (and how fast)
To react well, you need to know which parts of the forecast are stable and which are likely to shift on you.
What changes slowly (hours to days):
- General weather patterns – A large low-pressure system or a big high-pressure dome will not disappear in 30 minutes. If the region is under bad weather all night, don’t expect a miracle clearing.
- Overall aurora chances by latitude – If you’re very far south of the auroral oval, even a good KP 4 forecast doesn’t turn into KP 8 out of nowhere. Big geomagnetic storms are usually visible on space-weather charts many hours ahead.
What can flip fast (minutes to 1–2 hours):
- Local cloud cover – A small, stubborn cloud band can ruin one valley and leave the next valley perfectly clear.
- Aurora intensity – A quiet arc can suddenly brighten and explode across the sky and then fade again in 10–20 minutes.
- Direction of the best display – The main activity can shift from low in the northern horizon to high overhead or even to the south if the oval expands.
Your strategy is simple: don’t fight the slow stuff, but actively work around the fast stuff. If the whole region is under thick clouds all night, save your energy. If only your specific spot is cloudy or the aurora is playing hard to get, that’s when adaptation pays off.
Build a flexible plan before you leave
The best way to adapt later is to prepare options earlier. Before you get in the car, you should already know your “Plan B” and “Plan C”. Here’s how I build them.
1. Pick a primary area, not just a single point
Instead of saying “I’ll go to this one parking lot by this one lake”, I define a primary area about 20–40 minutes wide in driving time. Inside this area I want:
- At least two different valleys or fjords
- Some elevation change (a hill, a pass, a plateau)
- One or two lakes or open fields with low horizon
This gives you options if cloud cover changes by altitude or direction. Often, a short drive over a small pass is enough to go from “fully clouded out” to “usable breaks”.
2. Confirm multiple parking spots with a clear north view
On the map (and ideally in daylight beforehand), identify 3–5 realistic places where you can safely stop:
- Official roadside rest stops
- Parking lots of viewpoints
- Dead-end roads with space to turn around
- Harbour or marina car parks (check signs)
For each, check:
- Is there a clear, open view to the north?
- Is there light pollution from nearby buildings, ports, or ski slopes?
- Is the access road likely to be ploughed or icy?
Write these down or bookmark them on your map app. When the forecast changes at 22:30, you don’t want to start searching from zero.
3. Know your escape route back to town
Always plan how you’ll get back safely if the weather worsens or you’re too tired. Mark:
- The nearest town or village with accommodation
- Fuel stations along your route
- Sections of road you don’t want to drive in heavy snow or high wind
This is not pessimism, it’s stress reduction. If you know your “abort plan” in advance, you’re more relaxed when making mid-night decisions.
Read the forecast in “windows”, not as a single verdict
A common mistake is treating the forecast as a yes/no answer for the entire night. Instead, think in 2–3 hour windows.
For example, you’re in Tromsø and the data says:
- KP 3–4 between 20:00 and 02:00
- Cloud cover 60–80% early evening, maybe 30–40% after 23:00
- Solar wind speed increasing after midnight
Instead of “Tonight is good” or “Tonight is bad”, build a time plan like this:
- 20:00–22:00: Go to a nearby high point, accept some clouds, watch for early activity.
- 22:00–00:00: Be ready to move if gaps open inland or along the coast.
- 00:00–02:00: If the solar wind and clearing trend confirm, commit to the best-placed location, even if it’s further away.
By thinking in windows, you’re not “wrong” if the early part of the night is cloudy. You’re just waiting for your main window.
What to do when clouds suddenly ruin your spot
This is the situation every aurora hunter knows: the forecast promised decent gaps, you drove to a dark area… and a dense cloud band parks itself right above you. Here’s my method to decide what to do in 10–15 minutes.
1. Check the real-time cloud satellite or radar
If you have mobile data, open a cloud satellite or infrared image (or your favourite weather app that includes one). Ask yourself:
- Is this a large cloud shield covering the whole region?
- Or is it a local band or patch that might drift away in 30–60 minutes?
If it’s large and thick, your odds are low unless you’re ready to drive far. If it’s a narrow band, staying put can be smarter than driving blindly.
2. Look around, literally
Step out of the car and scan the horizon in all directions (if safe):
- Do you see stars anywhere? In which direction?
- Are the clouds layered (thin high clouds plus lower thicker ones), or just one solid blanket?
- Is the moon visible or at least glowing through the cloud?
Stars or a visible moon in any direction = there are gaps somewhere nearby. That’s a strong argument for moving a short distance in that direction.
3. Decide: wait 30 minutes or move 20–40 minutes
I usually apply this rule:
- Wait if: you’re in a known good spot, you see some stars or thinning clouds, and the satellite shows only a narrow band over you.
- Move if: full overcast, no stars anywhere, and satellite shows thicker clouds staying for several hours.
If I decide to move, I choose the nearest pre-planned parking option in the direction that looks clearer or less bright (depending on cloud vs light pollution issues).
Reacting to aurora spikes and sudden activity
Sometimes everything seems dead for an hour, and then suddenly the alerts start buzzing: KP jumps, the Bz turns strongly south, or friends are messaging you about bright displays 200 km away.
Here’s how to adapt without turning into a headless chicken.
1. Use short, focused checks of live data
When you’re on location, don’t live inside your phone. Instead, every 15–20 minutes quickly check:
- KP now rather than the 3-hour forecast
- Bz (north-south magnetic field): strongly negative (south) is good for auroras
- Aurora oval map to see if it’s expanding toward your latitude
If all three line up (rising KP, southward Bz, oval expanding over you), that’s the time to stop driving, get outside, and watch the sky carefully, even if you don’t see anything yet. Many of the strongest outbursts start as a faint arc that brightens very quickly.
2. Resist the urge to chase every rumour
Social media might show crazy photos from another city or another country. Before you react, ask:
- Is that place significantly further north (or south during a big storm) than me?
- Are their sky conditions realistically better than mine, or just different?
- How long would it take me to drive there, and what are the roads like?
During one strong storm near Abisko, I watched people race 2–3 hours toward locations that were already clouding over while missing a fantastic display that opened right above their original area 40 minutes later. Many times, the best adaptation is to commit to your region and simply shift within it, not across it.
When the forecast improves at the last minute
Sometimes the opposite happens: all afternoon the forecast looks poor, then around 19:00 the solar wind suddenly intensifies, or the cloud model updates and shows unexpected gaps. Do you go or not?
Here’s how I decide:
1. Check three elements, not just KP
A late improvement is interesting if you see:
- KP or nowcast above 3 for your latitude
- Sustained southward Bz (not just a 5-minute dip)
- Cloud coverage trend downward in at least one accessible direction within 1 hour’s drive
If all three are in your favour for the next 2–3 hours, it’s worth mobilising, especially if you were undecided anyway.
2. Use “emergency mode” location selection
In last-minute situations, don’t get perfectionist. Pick a place that is:
- Safe to reach and park in current conditions
- Dark enough in the north sector
- Simple to find in the dark (no complicated tracks)
You may not end up in your dream photo composition, but you’ll be outside with a clear view of the sky, which matters more when windows are short.
Downshifting when things get worse than expected
Not every night can be saved. Sometimes cloud cover solidifies, the solar wind calms down, and your energy tank is empty. Knowing when to stop is part of good planning.
Typical “time to downshift” signs:
- The latest satellite images and models all agree on persistent overcast in your reachable radius.
- KP drops and stays low, with no sign of improvement in the next 3–4 hours.
- You are tired enough that driving more feels unsafe.
When that happens, I do one of two things:
- Return to town early, sleep well, and prepare better for the next night.
- Switch to backup activities: night photography in the city, hot drink by the harbour, or simply resting while keeping a passive eye on the sky from somewhere easy.
This is not a failure. It’s resource management. One well-rested, well-planned, high-probability night beats three exhausted, chaotic nights in poor conditions.
Equipment and habits that make adaptation easier
A few simple choices before you leave can massively reduce “forecast stress” later on.
1. Keep the car ready for quick moves
- Don’t unpack everything at each stop; keep your gear organised so you can move in 5 minutes.
- Keep the fuel tank above half, especially in remote areas.
- Have an ice scraper, headlamp, and warm gloves accessible, not buried under luggage.
2. Dress for standing still, not for walking
Adapting to evolving conditions often means waiting in the cold, not hiking. Wear:
- Very warm boots and socks
- Multiple insulating layers on your upper body
- A windproof outer layer
- A hat and thin gloves under thicker mittens
If you’re not constantly freezing, you’ll make clearer decisions and be willing to wait through those crucial 30-minute windows when the clouds may open.
3. Simplify your camera workflow
If you use a camera, preset at least one “night aurora” configuration before you leave:
- Manual focus at infinity (checked on a distant light or star)
- Manual exposure somewhere around ISO 1600–3200, f/2–f/2.8, 3–10 seconds to start
- Remote trigger or 2-second timer activated
This lets you react faster when the aurora suddenly brightens. You can fine-tune once you’re capturing something. The goal is to avoid wasting the first outburst while fiddling with menus.
Managing expectations when the sky plays games
The mental side is as important as the technical side. Fast-changing forecasts can create frustration: “But the app said KP 5!” or “The clouds were supposed to clear at 22:00!”
Here’s a mindset that helps:
- Treat forecasts as probabilities, not promises. A 70% chance of clear sky always includes a 30% chance you’ll be in the unlucky part of the map.
- Redefine success. A good aurora hunt is not only about getting a perfect photo. It’s also about learning your area, testing spots, and building experience for the next trip.
- Celebrate small wins. Even a 10-minute break in the cloud with a faint green arc is a win on a difficult night. Many people go home without seeing anything simply because they gave up 30 minutes too early.
Over time, as you practice adapting instead of rigidly following one forecast, your stress decreases. You stop taking bad surprises personally and start treating them as navigational problems you can solve.
When the forecast flips next time—clouds where there should be stars, or auroras where there should be nothing—you’ll already know the drill: zoom out, reassess the next 2–3 hours, adjust your location, stay warm, and stay patient. The sky doesn’t owe us a display, but with a flexible plan and a calm mind, you give yourself the best possible chance to be under it when it finally explodes.