If you’re hunting the northern lights from a city, weather and cloud cover will decide 80% of your chances. Solar activity and KP index matter, but if the sky over your head is white or orange, it’s game over for that night in that spot. The good news: when you understand how clouds behave over urban areas, you can turn a “probably nothing” evening into a successful chase with just a few small moves.
Why a mostly clear sky beats a high KP every time
Think of the aurora as a movie projected on a screen about 100–300 km above your head. The atmosphere between you and that screen is your “viewing corridor”. Clouds are simply objects that block that corridor.
From an urban area, you’re already fighting two handicaps :
- Light pollution from streetlights, buildings and cars
- Lower horizon visibility because of houses, towers and hills
Add thick cloud on top, and you could have KP 7 above your head without seeing anything. On the other hand, with KP 2–3 and a mostly clear sky, your odds are already decent if you’re at a good latitude and know where to look.
As a rule of thumb for city-based watching:
- More than 70% cloud cover: chances are low unless you know there’s a break on the way and can move quickly.
- 30–70% cloud cover: this is the “maybe” zone. You need to hunt for gaps and choose your direction carefully.
- Less than 30% cloud cover: if solar activity is moderate and you’re far enough north, go out.
The rest of this article explains how to read those situations from a city and what you can realistically do without turning your trip into a meteorology exam.
Not all clouds are equal: what actually blocks the aurora
When you open a cloud forecast, you’ll usually see three layers: low, mid and high clouds. For aurora watching, each has a different impact:
- Low clouds (0–2 km): Stratus, fog, snow showers. These are the worst for you. Thick, uniform low cloud is basically a curtain. In cities, it reflects artificial light and creates that orange or white glow. If the low-cloud forecast is >80% for the night, staying in town is usually a bad bet.
- Mid-level clouds (2–6 km): Altostratus, altocumulus. These can be patchy. Thin mid-cloud might still let you see brighter aurora arcs, especially if light pollution is not extreme. From a city, though, you lose the faint structure and colors.
- High clouds (6–12 km+): Cirrus, jet trails. Thin high cloud often shows up as “milky” sky. From a dark rural spot, you can still see plenty through them. In a city, high cloud will reduce contrast but not completely kill the show unless it thickens into a solid veil.
So, what matters most when you are in an urban area?
- Low-cloud coverage: your primary enemy. A 30 km drive can sometimes get you from “complete ceiling” to “broken clouds with gaps”.
- Cloud thickness: thin broken clouds are manageable; thick uniform cover is not.
- Cloud motion: stationary overcast is worse than fast-moving showers. Moving cloud can create temporary windows.
If you only remember one thing: look at low clouds first. If they’re forecast to break up or move, you still have a game to play.
Why cities often sit under their own private cloud
Urban areas change local weather. Asphalt, concrete and buildings modify temperature, humidity and air circulation. That has real consequences for aurora hunters stuck downtown.
Typical urban effects you may notice:
- Urban heat island: Cities stay slightly warmer than surrounding countryside. On marginal evenings, that can maintain low clouds or mist over the city while nearby rural areas clear.
- Moisture pockets: Industrial zones, harbors and rivers feed extra humidity, increasing fog and low stratus right where the lights are brightest.
- Wind shadows and turbulence: Buildings disturb wind flow. Low clouds can “stick” over neighborhoods while they move more freely outside the urban core.
This is why locals in places like Tromsø, Reykjavík or Fairbanks often say: “If it’s cloudy in town, drive 20 minutes inland / towards the hills.” In many northern cities, the sky situation improves dramatically within a 15–40 minute radius.
When you plan a city-based aurora night, think in terms of rings:
- Ring 1 – City center: high light pollution, more low cloud risk, poor horizon.
- Ring 2 – City outskirts / suburbs: still some light, but often less cloud, more open spaces.
- Ring 3 – 20–60 minutes out: much darker, often drier and with more sky visible.
Your weather strategy is simple: use the forecast to decide if you can stay in Ring 1 for a casual watch or if it’s worth pushing to Ring 2 or 3.
Cloud cover vs. light pollution: finding the real bottleneck
Clouds and city lights interact. A thin layer of low cloud in a very dark rural area might not be fatal. The same thin layer above a bright city can turn the whole sky into a uniform orange sheet.
From a city, your visibility is limited by two things:
- Sky brightness (light pollution + clouds)
- Transparency of the air column (cloud thickness + humidity)
When both are bad, you see nothing. When one is bad but the other is decent, you might still salvage something.
For example:
- Scenario A: Thin high clouds, moderate light pollution, KP 3–4. You can probably see at least a faint arc, especially towards the darkest horizon.
- Scenario B: Thick low clouds, strong light pollution, KP 7. You will likely see only a glowing ceiling and maybe some brightness, but no real aurora shape or color.
Your operational goal: maximize the combination of dark sky + clear sectors, even if you stay technically within the “urban area”. That often means:
- Moving toward the darkest edge of the city (industrial zones without many lights, hinterland, harbors)
- Climbing a small hill or viewpoint to get above local haze and obstacles
- Finding parks or waterfronts that give you a wide view to the north (in the Northern Hemisphere)
How to read cloud forecasts when you’re staying in a city
You don’t need a meteorology degree; you just need to look at three things a few hours before you go out:
- 1. Total cloud cover (%) over your city between 20:00 and 02:00
- 2. Low-, mid- and high-cloud breakdown over the same period
- 3. Cloud motion (animation of forecast maps or satellite imagery)
Then ask yourself:
- Is there a clearer sector or time window within 30–60 km of the city?
- Are the low clouds thinning, moving or staying put through the night?
- Is there at least a 1–2 hour period with low clouds under 50%?
If the answer is yes to any of these, you don’t cancel your night; you adjust your plan:
- Shift your departure to match the clearest time window.
- Choose the direction that forecast maps show as having fewer low clouds.
- Prepare a Plan B location in case the first spot stays cloudy.
Satellite images (infrared at night) are extremely useful. They show actual cloud coverage, not just models. When you see breaks forming or moving, you can orient your route accordingly.
Practical urban strategies: from “just look up” to “mini-chase”
Let’s turn this into step-by-step options depending on the weather and your flexibility.
Case 1: Forecast mostly clear or broken clouds over the city
- Stay in town if you’re tired or don’t have a car.
- Pick a spot with:
- Open view to the north and northwest
- As few direct streetlights as possible
- Higher ground if available (viewpoints, hills, rooftop terraces where allowed)
- Arrive by 21:00–22:00 and stay alert until at least midnight; strongest shows often come between 22:00 and 01:00 local time.
Case 2: Patchy clouds, clearer sectors outside the city
- Convert your evening into a short “cloud dodge”.
- Check which side of the city looks clearer on radar/satellite: inland, along the coast, towards the mountains.
- Drive 20–40 minutes in that direction to a pre-scouted:
- Parking area with wide sky view
- Lakeshore, fjord, or riverbank
- Rest stop on a small hill or ridge
- Stay flexible: if a cloud bank rolls in, don’t hesitate to move 10–15 km to chase the next gap.
Case 3: Low solid overcast over the entire region
- This is when it’s genuinely not worth an all-night chase from the city.
- Use the night for rest and gear preparation.
- Check if the cloud deck is expected to lift on the following nights; often a bad front is followed by clearer, colder air that’s ideal for aurora.
The goal is to reduce “stress weather”: you make a clear go/no-go decision based on the best data, then commit to either resting or chasing without second-guessing every 15 minutes.
Examples from real cities in the auroral zone
Having spent many nights chasing gaps in northern skies, I’ve seen the same patterns repeat from city to city.
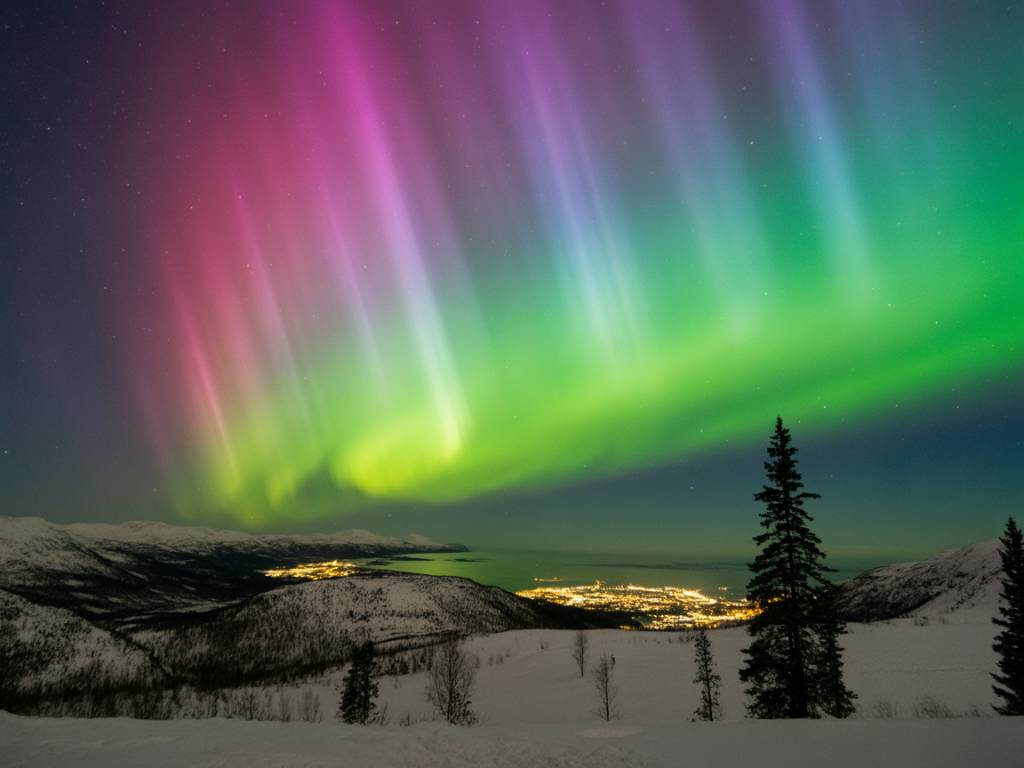
Tromsø (Norway)
- City center often sits under more cloud and light haze, especially in mild maritime flows.
- Driving just 20–30 minutes towards the islands (e.g., Kvaløya) or inland valleys can mean the difference between a milky sky and crystal-clear stars.
- On forecast maps, I look for “holes” over Kvaløya and the inner fjords, even if Tromsøya itself looks partly covered.
Reykjavík (Iceland)
- Weather changes fast; small gaps in cloud cover move quickly with the wind.
- If the city is socked in, the Reykjanes Peninsula or inland towards Þingvellir often offers slightly better cloud breaks.
- Wind direction is key: onshore flows bring cloud; leeward sides of mountains can see unexpected clear pockets.
Rovaniemi (Finland)
- The town can be misty along the river, with low clouds hugging the valley.
- Gently higher ground and forest clearings 15–30 minutes outside town often sit under drier, clearer air.
- A difference of 1–2°C in temperature between city and countryside can decide if fog forms or not.
These examples share one lesson: from an urban base, you rarely need to drive hours to escape clouds. Often, the most effective move is a short hop to slightly higher, darker, drier ground.
Timing: using cloud gaps and aurora peaks together
The aurora rarely stays at one intensity all night. It pulses. You might have a quiet, faint arc for an hour, then a 10–20 minute burst of dancing lights, then back to calm.
Clouds also move and thin. So the ideal viewing moment is when a burst of activity lines up with a gap in the clouds over your location.
To maximize the overlap from a city:
- Plan to be outside and set up by 21:30–22:00 local time.
- Give yourself a 3-hour viewing window (for example 22:00–01:00), rather than 20-minute “peeks.”
- Watch both:
- Short-term aurora alerts (KP, substorm forecasts, local alerts)
- Short-term cloud updates (satellite, local weather radar if available)
- If a cloud gap is approaching from one direction, position yourself so that your northern sky is in that gap at the expected time.
You’ll never perfectly time both, but you’d be surprised how often a mediocre-looking evening turns into a decent show because you stayed out slightly longer than you felt like.
Urban equipment choices when clouds are uncertain
When watching from a city with variable clouds, a few simple gear decisions can make the difference between frustration and usable memories.
- Tripod and camera ready, but portable: Don’t bring a full studio kit. A light tripod and one wide, fast lens (f/1.4–f/2.8) is enough. You want to be able to move quickly if a gap opens somewhere else.
- Clothing for standing still: Urban viewers often underestimate cold because they “aren’t far from the hotel.” You may still be standing motionless for an hour. Layers, windproof shell, warm footwear and a thin balaclava help you last long enough to catch a break in the clouds.
- Headlamp with red light mode: Even in cities, this lets your eyes adapt better when you’re in darker parks or edges of town, and you avoid blinding others.
- Backup battery and power bank: Cold plus screen use (you will check forecasts and maps) drains batteries faster than you think.
On very uncertain nights, I sometimes leave the big camera in the bag and start with just naked-eye watching. If the sky suddenly opens and activity jumps, I set up fast. Missing one or two early photos is better than hauling heavy gear pointlessly under solid cloud.
Managing expectations: making smart go/no-go calls
One of the most stressful parts of an aurora trip is deciding each evening: “Do we go out or not?” When you’re based in a city, the temptation is to hope the clouds magically clear over your hotel at midnight.
A more practical approach:
- Set a personal threshold: For example, “If low-cloud cover is forecast above 80% all night over a 100 km radius, we rest.”
- Use a two-check system:
- Afternoon check (15:00–17:00): general plan based on forecasts.
- Evening check (19:30–20:30): adjust based on satellite and updated models.
- Decide a latest departure time: If you haven’t committed by, say, 22:00, accept that this is a rest night.
- Don’t chase marginal skies every single night: Fatigue kills enjoyment and decision quality. Save energy for the best-looking forecasts.
When you travel for several nights, you are playing probabilities. Weather and cloud cover in urban areas will ruin some evenings and surprise you on others. By understanding the patterns—low clouds vs. high, city core vs. outskirts, motion vs. static—you give yourself a real advantage, even without leaving the comfort and logistics of a city base.