Myths about the northern lights that your data doesn’t agree with
If you spend a few evenings in Tromsø, Abisko or Reykjavik in winter, vous entendrez toujours les mêmes phrases à propos des aurores :
- “KP 5 means 100% guaranteed northern lights.”
- “Full moon kills the aurora.”
- “The best time is exactly midnight.”
- “If it’s cold and clear, there will be aurora.”
- “This app says KP 7 next week, we’re safe!”
On the ground, with real sky above your head, these shortcuts create stress and disappointment. My job, as a former weather tech now chasing auroras, is to cross-check folklore with real space weather data and practical field experience.
Let’s go through the main myths one by one and replace them with something more useful: simple rules based on real measurements and realistic expectations.
Myth: “KP 5 means guaranteed northern lights”
This is the most common one I hear in tour buses and hotel lobbies.
What people think: KP is like a “probability of aurora” score. KP 5 or higher = you will definitely see bright northern lights, no matter where you are in the auroral zone.
What KP really is: KP is a global index of geomagnetic disturbance. It’s an average value over 3 hours, built from magnetometer data at many stations. It does not say:
- if the sky is clear where you stand,
- how strong the aurora is right above your head,
- if the auroral oval has moved south or is still hugging the pole,
- if the brightest structures happened 2 hours before you went outside.
In practice, I’ve had:
- KP 1 nights with quiet, faint arcs clearly visible over Tromsø & Abisko (because we were directly under the oval and the sky was perfectly clear),
- KP 5–6 nights where my group saw nothing because a stubborn cloud deck blocked the sky for hours.
Better rule for travelers:
- KP 1–2: If you’re in the core auroral zone (northern Norway, Swedish Lapland, Iceland), you can already see aurora if the sky is dark and clear.
- KP 3–4: Good potential for structured aurora in the auroral zone; sometimes visible further south (Scotland, southern Sweden, parts of Canada).
- KP 5+: Possibility of aurora further south (northern Germany, UK, northern US), but still not a “guarantee” anywhere.
Stop reading KP like a yes/no answer. Use it as a background “activity level”, then combine it with two local factors that actually decide your night: cloud cover and darkness.
Myth: “The full moon kills the aurora”
What people think: You must avoid the full moon at all costs, or you won’t see anything.
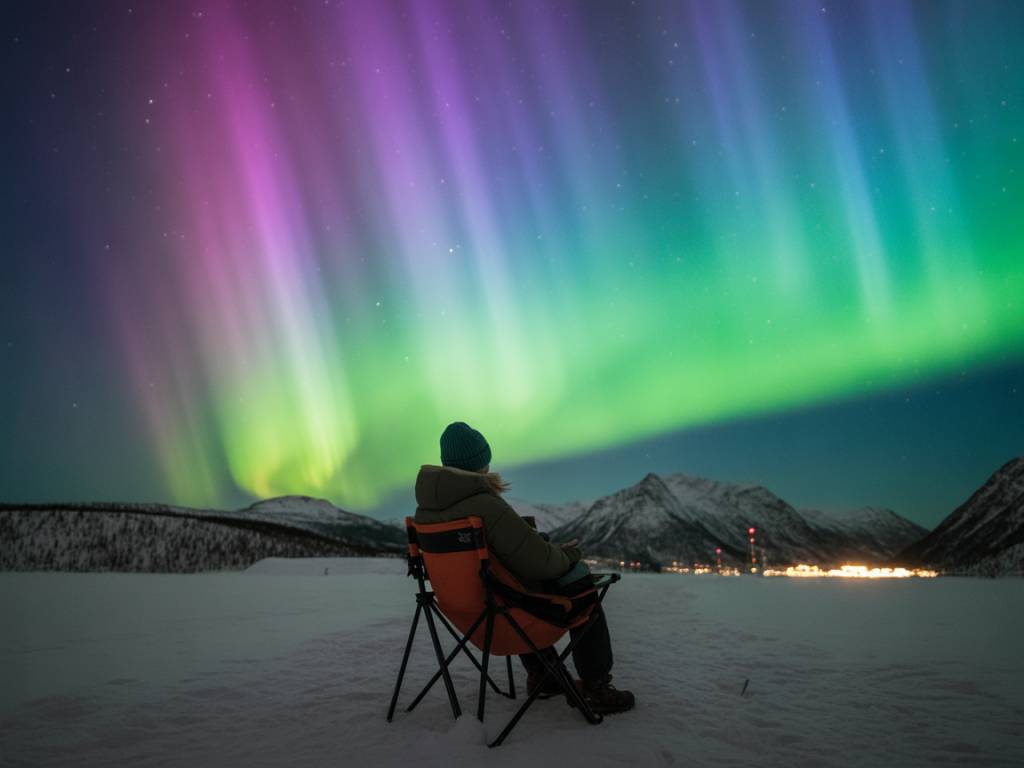
Reality from the field: I’ve photographed some of my sharpest, most detailed aurora under a full moon – especially when the aurora was active but not extreme. The moon acts like a giant softbox:
- it lights up the snow and landscape,
- it lets your camera use lower ISO and shorter exposures,
- it gives you depth and contrast around the aurora curtains.
What the moon does is raise the background brightness of the sky. That makes very faint aurora more difficult to detect visually, especially at low latitudes. But in classic aurora destinations, when the aurora is reasonably strong, you’ll still see it very well.
When the moon is really a problem:
- if you are very far south at the limit of visibility, trying to catch a weak KP 1–2 aurora,
- if you’re doing scientific measurements of faint airglow or sub-visual aurora with sensitive instruments.
Practical tip: Do not cancel a trip because it falls on a full moon. If the forecast shows clear skies + KP ≥ 2–3 + you’re in the auroral zone, you still have a good shot. Just let your eyes adapt well, avoid direct light from street lamps, and use the moon to your advantage for photography.
Myth: “It has to be extremely cold for the aurora to appear”
What people think: “The colder it is, the better the aurora.”
Scientific reality: The aurora happens around 100–300 km above your head, where the temperature near the ground has no direct effect. The aurora doesn’t “feel” your –20 °C or your +5 °C.
What really links cold and aurora in people’s minds is cloud cover. In many northern locations, clear winter nights are often also the coldest nights because:
- no clouds = more radiative cooling at the surface,
- cold continental air masses are often drier and clearer than mild maritime ones.
So yes, many great aurora nights are cold. But I’ve watched spectacular auroras at +3 °C in coastal Norway under a wet northwesterly flow, and in Iceland during mild spells. The aurora didn’t care.
Better rule: chase clear, dark skies, not cold. Dress for the worst temperature expected that night, but don’t treat the thermometer as a forecast tool for aurora activity.
Myth: “The northern lights only happen in deepest winter”
What people think: Auroras are a “winter phenomenon”. January and February are “the aurora months”.
Reality: The aurora is active in the upper atmosphere all year round. What changes with the season is whether the sky is dark enough where you are to see it.
In the high Arctic, summer brings the midnight sun. You could have a KP 7 storm above your head in July and you’d never see it from the ground because the sky never gets dark.
So your “aurora window” at a given latitude is simply the period of the year when:
- night is dark enough (sun at least 12–18° below the horizon),
- the weather gives you a decent chance of some clear skies.
Rough guide for popular locations (visual aurora):
- Tromsø / Abisko: from late August to early April.
- Reykjavik / Iceland: from late August to mid-April.
- Fairbanks, Alaska: from late August to mid-April.
- Scotland / Southern Scandinavia: mainly September–March, with shorter windows of darkness.
The “deep winter only” idea is a myth. Autumn and early spring often combine decent darkness, milder temperatures and less extreme snow/road conditions – which can mean less stress and more flexibility for road-based aurora chasing.
Myth: “Midnight is the only time to see the aurora”
What people think: There is a “peak” at local midnight; before 23:00 and after 01:00, nothing interesting happens.
What the data shows: Statistically, auroral activity tends to be higher around magnetic midnight (which can be offset from clock midnight by an hour or more depending on your longitude and time zone). But this is a statistical preference, not an on/off switch.
From the field and magnetometer data:
- Pre-midnight substorms (21:00–23:00 local time) are very common.
- Post-midnight pulsating aurora and bright arcs can last till 02:00–03:00 or more in active conditions.
- During strong storms, I’ve watched bright auroras at 18:00 as soon as it was dark, and still see activity at 04:00.
Practical timing strategy:
- If you have one main outing: aim to be in position with a clear northern horizon from about 21:00 to 01:00 local time.
- If forecasts and live data show high activity (strong solar wind, southward Bz, rising indices), extend both sides: as soon as it’s dark till you’re too tired or conditions clearly drop.
- If you’re with kids or short on sleep: focus on the first dark hours after sunset when activity is expected, not only on “midnight”.
Myth: “One app can tell me, days in advance, if I’ll see the aurora”
What people think: Download an aurora app, check KP for next week, book the “best” night, done.
Why this fails in real life:
- App KP forecasts beyond ~3 days are based on solar rotation and persistence, not on direct measurements of the solar wind that will hit us precisely at that time.
- Short-term storms or coronal mass ejections (CMEs) can completely change the picture with just a few days’ notice.
- The app usually has zero information about your local cloud cover, fog, or snow showers.
KP predictions weeks ahead are more like “climate tendencies” than weather forecasts. They can guide your choice of travel month (e.g. during solar maximum years, KP tends to be higher overall), but they don’t decide your luck on a specific evening.
Data that really matters close to your night:
- Solar wind speed and density, IMF Bz, and other real-time space weather parameters measured by satellites like DSCOVR.
- Short-range geomagnetic indices (AE, local K-indices over Scandinavia, Alaska, etc.).
- High-resolution cloud cover forecasts from local weather models (e.g. ICON, AROME, HRRR, depending on the region).
How to use apps without stress:
- Use them to set an alarm when KP or activity indicators exceed a threshold and it’s dark where you are.
- Combine them with a reliable weather app or local forecast maps for clouds.
- Update your plan every 3–6 hours, not 7 days in advance.
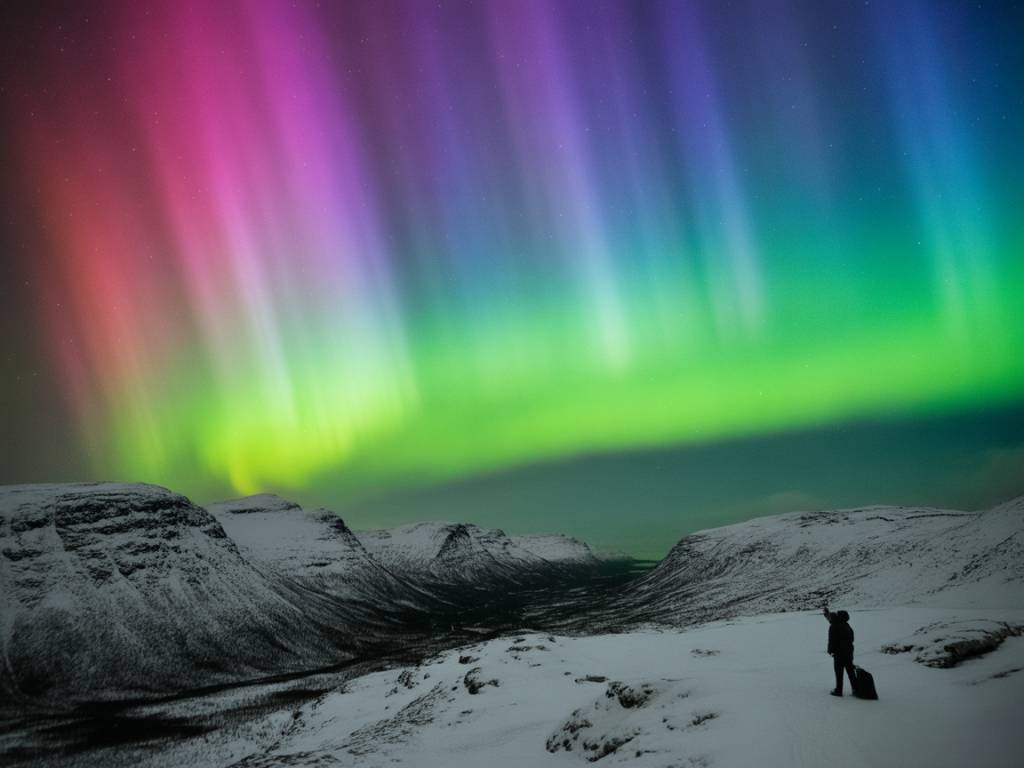
Myth: “Aurora = mainly green, so if I don’t see green, there’s nothing”
What people think: The aurora is always neon green like on Instagram; if the sky just looks like pale grey clouds, there’s no aurora yet.
Reality: The human eye at night is less sensitive to color, especially in the dark. Cameras, with long exposures, boost both color and brightness. In the field, especially at the beginning of the night:
- Faint aurora often appears as a milky, greyish or slightly greenish band, usually oriented east-west.
- To an untrained eye, this can look like thin high cloud, until it starts to move or brighten.
- Red or purple tops of strong aurora can be very subtle visually while exploding in camera images.
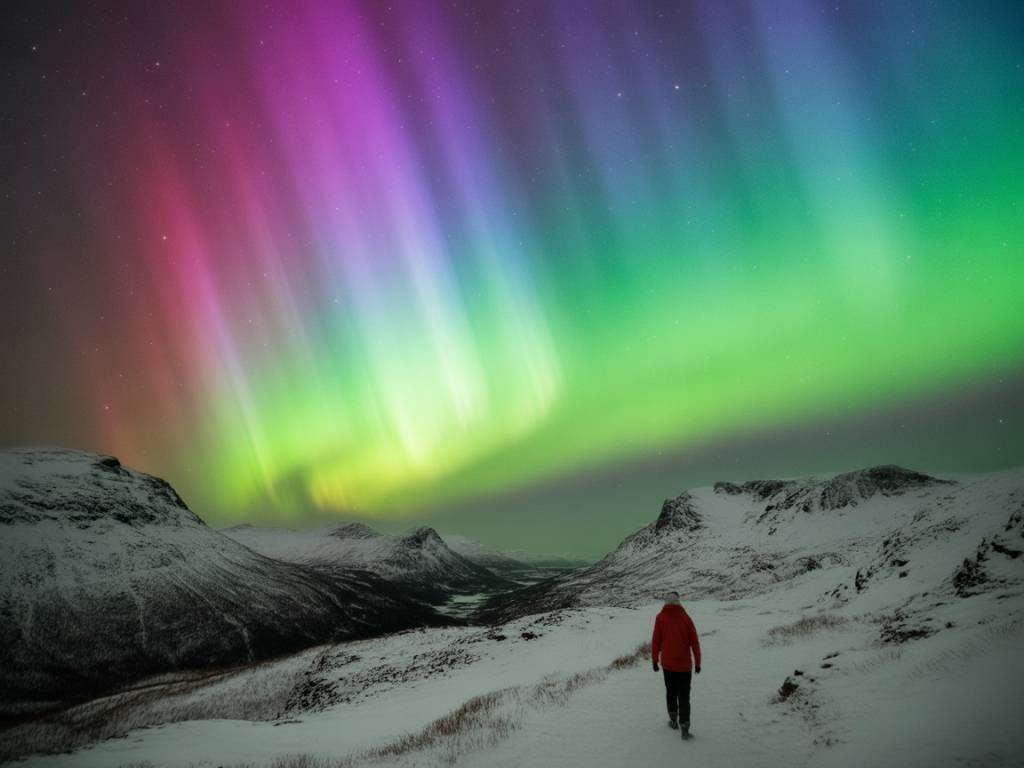
Simple tricks to detect faint aurora:
- Use a short test photo: 5–10 seconds at high ISO on a wide-angle lens; if the “cloud” has clear structure and green tone on the screen, it’s aurora.
- Watch for movement: real aurora often shifts, pulsates, forms arcs and rays; clouds drift more slowly as blocks.
- Look north, slightly above the horizon, for stable arcs that remain in roughly the same area while changing internally.
Don’t wait for “perfect Instagram green curtains” to decide you’re seeing aurora. If you start recognizing faint arcs early, you’ll see more shows than people who only react to the brightest displays.
Myth: “If the forecast is bad, there’s nothing I can do”
What people think: Cloud cover map shows 80% clouds over the region. End of story, let’s stay in the hotel bar.
Field reality: Some of my best aurora nights started on “bad” forecasts. The trick is to think like a driver, not like a satellite image.
Cloud forecasts are never perfect. They have systematic errors depending on:
- local topography (coastal mountains, fjords, inland valleys),
- small-scale systems like sea-effect snow or local fog,
- timing of frontal passages.
In practice, many nights offer at least short windows of clear sky if you’re willing to move:
- Drive inland from moist coasts to drier valleys.
- Use real-time satellite images and road webcams to chase gaps in the cloud shield.
- Look for leeward sides of mountains, where clouds often break.
Example from the field: One March night in northern Norway, the models showed heavy cloud all evening. We watched the live satellite loop: a narrow dry slot was pushing between two cloud bands about 50 km inland. We drove exactly there, waited 40 minutes in a cold parking area – and caught a one-hour clear window with a strong KP 4 aurora.
You can’t beat every bad forecast. But you can often turn a “no chance” evening into a “maybe” if you work with short-range data and local geography.
How real space weather data turns into practical instructions
Let’s pull all this together into a typical decision chain that I use on tour nights.
24–48 hours before:
- Check upcoming solar wind conditions (~2–3 days out if a coronal hole or CME is known): expected speed, duration, and strength.
- Look at cloud cover models over your region for the night window (e.g. 18:00–03:00).
- Note the moon phase and moonrise/moonset times.
- Plan broad areas: “coast vs inland”, “north vs south valley”, with backup routes.
6–12 hours before:
- Update cloud forecasts; focus on exact timing and altitude of cloud layers (low stratus vs high thin cirrus).
- Monitor whether solar wind is actually arriving as expected: watch for increases in speed and density, and Bz turning southward.
- Choose primary target area and a backup area reachable in 1–2 hours of driving.
1–3 hours before heading out:
- Watch real-time magnetometer data and auroral oval maps (e.g. from NOAA SWPC, regional institutes).
- Check latest satellite loops and webcams to locate real gaps in cloud cover vs what the model predicted.
- Decide departure time and first stop: a dark, open view to the north, easy to leave if clouds change (parking lots, small side roads, lakeshores).
On-site during the night:
- Adjust your position if clouds close in: don’t hesitate to move 20–50 km if the data suggests clearer conditions nearby.
- Use a simple camera test shot every 15–20 minutes to catch early faint activity.
- Keep an eye on live Bz and activity: if it turns strongly north and stays that way for long, you might downshift your expectations; if it swings south, be ready for a burst.
This is the kind of pipeline I use to transform complex KP charts and space weather jargon into plain questions:
- Where should I stand?
- At what time do I really need to be in place?
- How long should I wait before moving?
- What’s my plan B if clouds win here?
What to actually focus on when planning your aurora trip
Instead of chasing myths or a specific KP number, build your trip around these few solid principles:
- Location: Go high enough in latitude that KP 1–3 already puts you under the oval (northern Norway, Swedish/Finnish Lapland, Iceland, interior Alaska, etc.). This removes the need for “big storms” to see something.
- Duration: Give yourself several nights. More nights = more chances to catch at least one clear and active window, especially in changeable climates like Iceland.
- Mobility: If possible, rent a car or join flexible tours that move away from city clouds. Being able to drive 50–100 km can double your effective clear-sky chances.
- Darkness, not only winter: Choose dates with enough dark hours and acceptable road conditions for you. Late September and March can be excellent compromises.
- Clouds first, KP second: A KP 2 under a clear sky is far better than KP 6 behind a solid overcast. Always check cloud cover before getting excited by high KP predictions.
- Real-time adaptation: Use apps and websites as tools, not oracles. Update your plan as real data comes in the same day.
- Comfort and safety: Dress warm, pack hot drinks, keep your fuel tank comfortable, and know your return route. A relaxed body and mind spot auroras better than a frozen, stressed one.
When you let go of the big myths and start reading the sky (and the data) for what they really say, two things happen: your expectations become more realistic, and your chances of actually standing under a moving green curtain quietly increase.
That’s the real goal of data-driven aurora forecasting: less superstition, less KP obsession, and more time spent under clear northern skies, eyes up, instead of on your phone.