


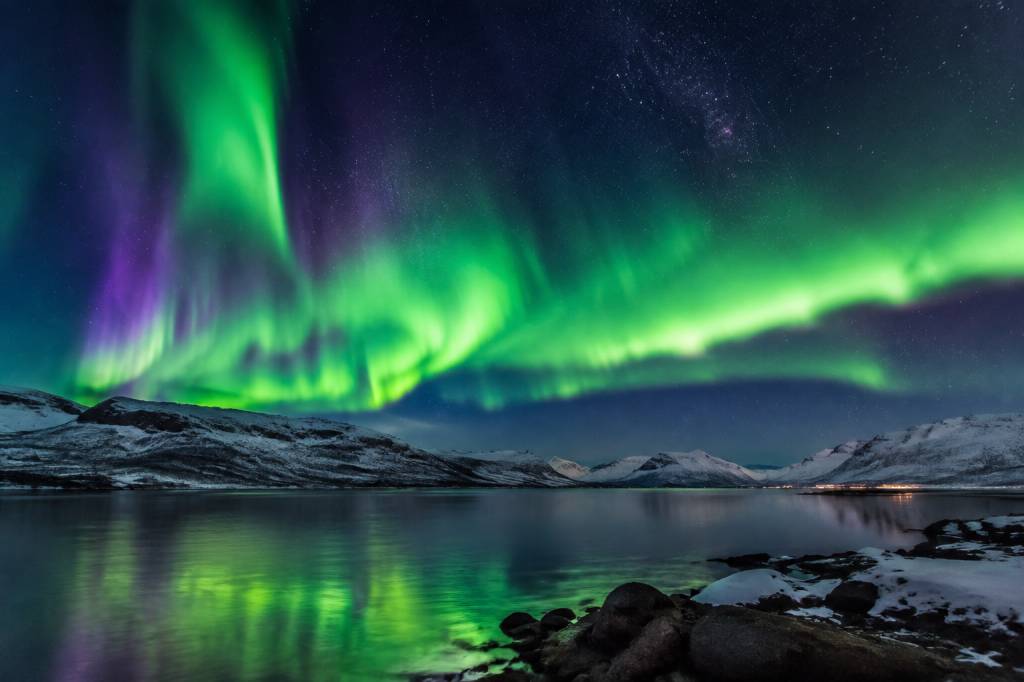
Will the northern lights be visible tomorrow? The honest answer depends on where you will be, how much cloud is in the way, how dark the sky gets, and how the aurora behaves. A forecast can help you choose a time and a place, but it cannot promise a display. Even a strong space-weather alert is only one part of the picture.
Use this practical checklist to turn tomorrow’s forecast into a plan: check auroral activity, read the local cloud forecast, find a dark and accessible viewing spot, and decide when you will reassess. You do not need to decode every space-weather chart. You do need a clear patch of sky and a sensible backup plan.
Start with your location
Aurora forecasts are local in practice. The same activity may bring a strong display to northern Norway while offering little chance of seeing anything from southern England. Before checking an app, enter the town or region where you will actually be tomorrow night. If you plan to drive outside town, check the forecast for that area too: cloud cover can change over a short distance.
Latitude matters because the aurora tends to form in an oval around the magnetic poles. The farther north you are, the more often the oval is overhead or nearby. In places such as Tromsø, Fairbanks, Yellowknife, and northern Iceland, auroras can appear during ordinary levels of geomagnetic activity, provided the sky is dark and clear. Farther south, a stronger disturbance is usually needed, and sightings are less frequent.
Season matters as well. In summer, locations above the Arctic Circle can have too much daylight for a visible display, even if the aurora is active. In winter, long nights create more viewing opportunities, but cloud, snow, wind, and cold can make the outing harder. Check the local times for sunset, the end of twilight, and sunrise. A forecast that looks promising at 1 a.m. is not useful if the sky is still bright.
Check three parts of the forecast
To estimate your chances tomorrow, look at three things: geomagnetic activity, cloud cover, and darkness. Think of them as three gates. The aurora must be active enough, your sky must be clear enough, and the sky must be dark enough. If one gate is closed, the view may be disappointing.
-
Geomagnetic activity: This indicates how disturbed Earth’s magnetic environment is. The KP index is a common summary, usually shown on a scale from 0 to 9. Higher values can mean the auroral oval expands farther from the poles, but KP is a broad measure—not a local guarantee.
-
Cloud cover: Thin cloud can dim the display; thick cloud can hide it completely. Check the hourly forecast, not just the daily icon. A partly cloudy night may still offer a useful gap.
-
Darkness: The aurora is easiest to see against a dark sky. Moonlight does not automatically ruin a view, but bright city lights and twilight reduce contrast, particularly for faint displays.
If your forecast shows a low KP value, do not immediately give up if you are far north. A modest display may still be visible under the auroral oval. If the KP value is high, do not assume a sighting is certain: clouds can block even a spectacular event. In the field, the sky above you matters more than a dramatic number on a screen.
Read KP forecasts with care
The KP index is useful for understanding the broad level of geomagnetic activity, but it is often misunderstood. It is not a brightness score for your exact location, and it does not tell you precisely when the lights will appear. A forecasted KP value is also an estimate, and conditions can change as the solar wind reaches Earth.
For a more useful picture, combine a short-term aurora forecast with current space-weather observations and a local cloud forecast. The NOAA Space Weather Prediction Center publishes aurora and geomagnetic information for the current period. Regional forecasting services can help you interpret activity for a particular destination. Use these tools as guidance, then check the sky yourself.
Pay attention to the forecast’s time window and update time. A prediction made earlier in the day may be less useful than a recent update when conditions are changing quickly. If an app shows a high probability, ask what that probability means: visible somewhere in the region, or likely from your exact viewing point? Those are not the same thing.
Choose a viewing time, then stay flexible
There is no universal best hour. Auroras can appear at different times through the night, and local cloud conditions may be more important than the most active period shown in an app. In many northern destinations, travellers watch the sky during the darkest hours, often from around 10 p.m. into the early morning. Treat that as a useful window, not a timetable.
Check the hourly cloud forecast before leaving and again after you arrive. If the sky is overcast at 9 p.m., that does not necessarily mean the whole night is lost. Cloud bands may move, and a clear opening can appear later. On the other hand, driving for hours toward a forecasted “perfect” viewing window is rarely sensible if the road is icy or the cloud map is uncertain.
Plan a first check-in time and a latest return time. For example, you might drive to a nearby dark-sky site at 9:30 p.m., reassess the cloud and aurora around 11 p.m., and head back before fatigue becomes a safety issue. A simple plan is better than refreshing several apps every two minutes while standing in a car park.
Find a dark, safe place to watch
Choose a location away from strong streetlights, shop fronts, and busy roads. You do not need a mountain summit. A public beach, open field, lakeshore, or designated viewpoint may provide a wide view of the sky, as long as it is legally accessible and safe in the conditions.
Before setting out, check the route in daylight if you can. Confirm that the car park is open, that the road is maintained, and that the viewpoint does not require a long walk over snow or ice. Do not stop on a road shoulder to take photographs. A dark, remote spot is not automatically a good spot if you cannot park safely or find your way back.
Keep a backup close to town. If the roads are poor or cloud is thick in one direction, a safe local viewpoint may be a better choice than a long drive. In some locations, a break in the cloud just a short distance away can make all the difference. Check road reports and local closures before following a forecast to a remote area.
What if the forecast looks weak?
A weak forecast does not always mean there is no chance, especially in a high-latitude destination. If you are already in the north, look for a dark place with a clear northern horizon and keep expectations realistic. A faint aurora may first appear as a pale grey or greenish band. A camera can sometimes record colour before your eyes clearly detect it, but a phone image is not proof that the sky will look bright in person.
If you are travelling from a lower latitude, be more selective. A KP forecast that is low for your region, combined with thick cloud and a bright moonlit sky, makes a long night drive difficult to justify. Save your energy for a clearer opportunity, and make sure you know when your trip’s remaining dark nights are. The aurora does not follow a holiday itinerary.
Do not chase every alert. Rapidly changing forecasts can make it tempting to move from one town to another, but each move adds time, fuel costs, and driving risk. Compare the cloud cover and road conditions first. If the forecast is uncertain, staying near a safe base and checking again later may be the better call.
Pack for waiting outdoors
Watching the aurora often means standing still for a long time in cold air. Dress for the temperature and wind, not for the short walk from your hotel to the car. Several thin layers are easier to adjust than one bulky layer. Warm boots, gloves or mittens, a hat, and a windproof outer layer will make the wait much more comfortable.
-
Bring a charged phone, an offline map, and a power bank kept warm in an inside pocket.
-
Carry a headlamp with a red-light setting, plus a torch for finding the path back to the car.
-
Pack water and a warm drink, and bring a spare layer in case the temperature drops.
-
If you are driving in winter, carry the locally recommended emergency equipment and check that your vehicle is prepared for the route.
For photographs, a tripod helps because exposures may last several seconds. Start with your phone’s night mode or a camera’s manual settings, and take a test image. Keep your screen brightness low to protect your night vision. You do not need professional equipment to enjoy the display; spend more time looking up than adjusting settings.
How to make a decision tomorrow
Use this quick sequence when you check the forecast. First, confirm that your destination will be dark during the viewing period. Second, look at hourly cloud cover for both your base and one or two nearby alternatives. Third, check the latest aurora forecast and note its time range. Finally, compare the opportunity with the road conditions, travel time, and your own energy.
-
Good setup: Dark skies, a clear or partly clear local forecast, and a location within or near the auroral oval. Go to a safe dark-sky site and check the sky regularly.
-
Mixed setup: Some cloud or uncertain activity, but a nearby clear area may be available. Keep your route short and flexible, and set a time to reassess.
-
Poor setup: Thick cloud across the region, bright twilight, or unsafe roads. Stay near your accommodation, monitor for changes, and avoid a risky chase.
Keep expectations realistic
Forecasts estimate conditions; they do not promise a show. The aurora may be faint, appear briefly, or remain hidden behind cloud. Sometimes the sky is quiet for hours and then brightens in a few minutes. That uncertainty is part of the experience, but good planning can reduce wasted driving and make the waiting more comfortable.
So, will the northern lights be visible tomorrow? They may be, if geomagnetic activity, darkness, and local weather line up at your location. Check the latest forecast for your town, pay particular attention to the hourly cloud cover, and choose a safe viewing spot with a backup nearby. Then give your eyes time to adjust, keep warm, and look up. The best forecast is the one you combine with a clear view of the actual sky.